Book A Demo
Categories
Product Updates

Feature Overview: How To Use Buildups

Updating multiple items individually can be time-consuming, especially when a single change affects several tasks within one of your projects. The Buildups feature allows you to make top-level changes, automatically updating all the associated materials, labour, and costs without you needing to manually edit each row. In this guide, we’ll show you how to use Buildups to make project updates faster and keep your estimates accurate with minimal effort.

What Exactly Is A Buildup?

In BuildPartner, a “buildup” is the recipe used to calculate the cost of a specific task. Instead of just assigning a flat price to a job (like "£50 for painting a wall"), the system builds up the cost from its core components.

Every task in the schedule is broken down into three components. For example, “Paint internal wall”:

  1. Materials: The physical items required to complete the task, including the specific materials used and quantities needed per unit of measurement (e.g., paint and litres required).
  2. Labour: The trade required and time needed to complete the task (e.g., painter, 0.2 hours per square metre).
  3. Plant & Equipment (if applicable): Any specialist tools or machinery required that aren’t standard hand tools (e.g., access towers or specialist spraying equipment).

So, when you add a task to a room, the system uses the room’s dimensions (like wall area) to determine the total quantity needed. It then multiplies that quantity by the buildup. Because Buildups are dynamic, if you change a room’s size, the material quantities and labour hours automatically adjust.

Let’s look at an example.

How To Use Buildups

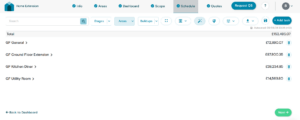
To get started, log into your BuildPartner account and head to the Schedule tab. Here, you’ll see a Buildups icon at the centre towards the top of the screen. Click the word Buildup rather than the dropdown arrow (we’ll come to that shortly).
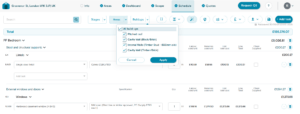
This reveals an expandable breakdown of the costs of specific tasks associated with each storey. This view looks similar to “Areas” and “Stages” in the Schedule.

From a practical perspective, the Buildups feature allows you to edit tasks in just a few clicks, rather than manually updating rows of items line by line. 

For example, you can change a roof buildup from pitched to flat without having to manually add and remove multiple rows of information associated with each build type.
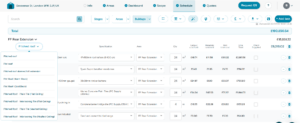
To change the pitched roof, click the dropdown arrow of the button on the left side of the screen. When you click it, you’ll be presented with a bunch of options. Changing from a pitched roof to a flat roof automatically updates the project costs.

You’ll notice that certain tasks associated with a pitched roof disappear, such as:

  • Timber pitched roof structure
  • Pitched roof vent
  • Concrete plain tiles

And these are replaced by specific tasks related to building a flat roof:

  • Timber flat roof structure
  • Timber firrings to roof
  • Flat roof vent

This is where the true utility of Buildups comes in. You can make significant changes to a project’s specification in seconds, with all associated tasks, materials, labour, and costs automatically updated. This makes it much easier to respond to client changes and explore different options to align with their budget.

Some of the most commonly adjusted Buildups include switching between brick/blockwork and timber construction, changing roofing types from pitched to flat, and updating internal walls from stud to concrete.

Toggling My Buildups View

You can see which Buildups your project is using by clicking on the drop-down arrow next to the word Buildups. Please note: deselecting items in the Buildups list does not remove them from the project costs. It simply hides them from view, making it easier to navigate without having to scroll through dozens of rows of pricing data.
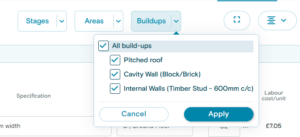
As ever, you remain in complete control. At any time, you can manually adjust the specifications of each task by selecting the relevant dropdown, changing the required quantity, marking a material as client supplied, or removing an item altogether.

We’re always improving BuildPartner to help you make changes faster, reduce manual updates, and keep your project costs accurate. If you have any feedback on how you’re using Buildups or suggestions for future improvements, we’d love to hear from you. Please email us at [email protected].
Categories
Product Updates

Feature Overview: Changing Specifications & Bulk Editing

BuildPartner’s specification and bulk editing tools make it simple to update materials, costs, and project details without having to make changes individually. This guide explains how to make those changes to keep your project pricing consistent and accurate. 

Changing A Project’s Specification

Quite often, clients will change their minds about a project’s specifications. There’s a super-easy way to change a project’s specification in BuildPartner without having to create another from scratch.

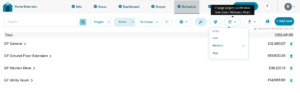
At the top of the Schedule page, look for the icon that looks like 3 lines (usually next to the paintbrush icon). Click it to reveal a drop-down list: Low, Medium, and High.

  • Low spec includes more budget-friendly brands such as Leyland, Everest, and Wickes.
  • Medium spec includes widely used brands such as Dulux, Hamilton, and Slim Line.
  • High spec includes premium brands such as Farrow & Ball, Fine Line, and Siemens.

Choose your preferred specification. It’s as simple as that!

Now, your client may still request certain materials of a particular specification. For instance, to balance their budget, they may insist that a low spec is used throughout an entire house, but they may want a high-spec bathroom suite.

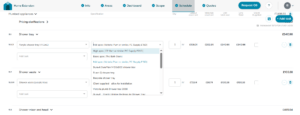
In that case, on the “Schedule” tab, you can manually change the project areas and tasks by selecting the relevant dropdown in the Specification column.

For example, the available acrylic shower tray options based on material costs include:

  • Low spec: The Bath Store – £135
  • Mid spec: Victoria Plumb or similar – £202
  • High spec: CP Hart or similar – £270

Using The Bulk Edit Function

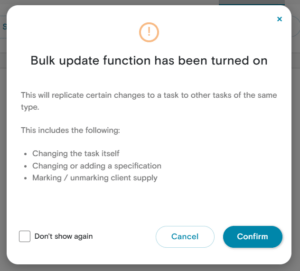
When navigating the interface, you might have noticed the bulk edit function at the top of the Schedule page. It can be toggled on and off, but what does it actually do?

Once switched on, it monitors for changes that could apply to similar tasks and prompts you when an update opportunity is available. You remain in control, with changes only applied when you choose to update similar tasks.

Some of these changes include:

  • Changing the task itself
  • Changing or adding a specification
  • Marking/unmarking “Client Supplied”

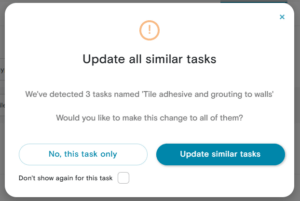
For example, suppose you check the box “Client Supplied” for skirting in the kitchen; it would pop up with a message:

“We’ve detected 5 tasks named ‘Skirting’. Would you like to make this change to all of them?”

Or suppose you changed the electric towel rail from standard spec to mid spec:

“We’ve detected 2 tasks named ‘Electric towel rail’. Would you like to make this change to all of them?”

When this popup box appears, you have two options: 

  1. “No, this task only”
  2. “Update similar tasks”

So rest assured, no significant changes will be made to your projects without your authorisation.

We’re always improving BuildPartner to help you work faster, reduce manual updates, and simplify project management. Let us know how you’re finding things or what you’d like to see by emailing us at [email protected]

Categories
Product Updates

Feature Overview: Toggling All Finishes To Client-Supplied Or Builder-Supplied

When building a cost plan, you or your client may prefer an estimate for labour and materials only and exclude all finishes for the homeowner to supply. This is now very easy to do thanks to the “Toggle All Finishes” feature. With it, you can update finishes in bulk in just a couple of clicks, saving you time and reducing the risk of errors. In this article, we’ll show you how.

How To Toggle All Finishes

To get started, head over to the Schedule page. You’ll see an icon that looks like a paintbrush. Hover over it, and it’ll reveal a message: “Toggle finishes to client-supplied/builder-supplied”.

Before clicking, you may find peace of mind in creating a copy of your project, in case the bulk changes don’t produce the outcome you’re after. You can do this via the Info tab > Project Actions > Duplicate Project.

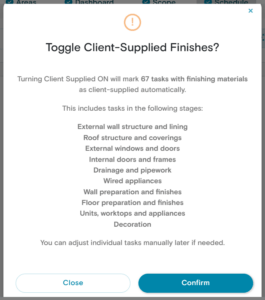
When you’re ready, click the paintbrush icon. A pop-up message will appear confirming the action. The change is fully reversible, so you don’t need to worry, and you can also manually adjust items afterwards.

For example, in a list of 67 finishes, you might only need to override a handful, e.g., five or six specific items the builder will continue to supply. This is far quicker and easier than scrolling through and selecting 60+ items individually.

When you’re ready, Click Confirm to proceed.

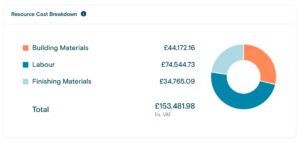
After changing to client-supplied, in the example of a 35m² home extension, the overall cost reduced from £153.5k to £118.7k (a 22.7% decrease). This decrease is indicative only and will vary depending on the project type.

Drilling Down Into The Changes

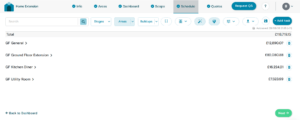
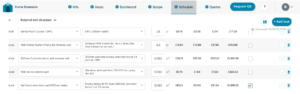
To sense-check the detail, head to the Schedule page and click the collapse icon (shown as a plus symbol). This will expand the full itemised breakdown. You’ll also see a column with checkboxes for client-supplied items. A tick indicates the client is supplying that item.

To see how this applies in practice, take the External Wall Structure section (screenshot below). Here, bricks are classified as a finishing material and will now default to client-supplied. However, items such as wall ties, concrete blocks, and the damp-proof course are classified as building materials.

To revert this change and switch everything back to builder-supplied, simply click the paintbrush icon again and select confirm. This will restore the original cost and remove all client-supplied checkmarks.

Cost Breakdown Overview

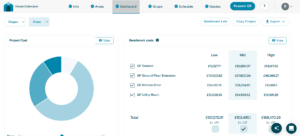
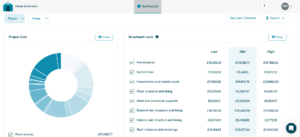
If you want a top-level view of finishing and building material costs, head to the Dashboard and scroll to the Resource Cost Breakdown section.

This is particularly useful when you start toggling items manually, as you can immediately see the impact and helps you align the cost plan with the client’s budget.

We’re continually improving BuildPartner to make quoting for projects easier, faster, and as frictionless as possible. If you’ve got feedback on the Toggle Finishes feature or anything else you’d like to see improved, drop us a line at [email protected]

Categories
Product Updates

Feature Overview: Issuing Homeowners A Dashboard Link

Issuing homeowners a dashboard link in BuildPartner gives them a simple way to view your estimate without needing their own account or requiring you to download and email your estimate. This guide explains how to generate and share a homeowner dashboard link, giving clients greater transparency into their project’s pricing.

Finding The Dashboard Link

Log into your BuildPartner account and navigate to the Dashboard tab. In the top-right corner, click Dashboard Link.

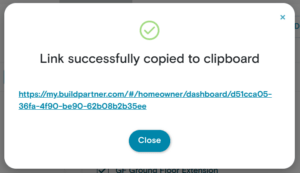
Clicking Dashboard Link opens a confirmation window showing that the link has been successfully copied to your clipboard, ready for you to paste and send to your client via email, WhatsApp, or your preferred messaging platform.

Testing The Dashboard Link

If you want peace of mind and to see exactly what your client will see, simply paste the link into a new tab. If you encounter any loading issues, it may be due to being already logged into BuildPartner in your current browser session.

In that case, open the link in a different browser (not another tab of your existing one). For example, if you normally use Chrome, try Microsoft Edge or Safari and paste the link there. Alternatively, you can open an incognito or private browsing window and use the link from there.

Viewers can’t edit any project details, but they do get access to Stages and Areas, allowing them to see how costs are broken down across individual tasks. They can also export a full project breakdown in Word or PDF format for easy sharing and record-keeping. 

The only change they can make is to deselect items to remove them from the breakdown, allowing them to see the impact on the overall project cost in real time. For example, if they remove a specific area such as a utility room, the total cost will automatically update to reflect that change.

A Timeline

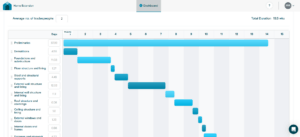
The dashboard link also gives clients a live timeline of how long the project is expected to take.

It’s based on the critical path, and tasks are laid out in the exact order they would typically need to happen, assuming each stage follows on immediately from the last. In other words, it models a “best case flow” with:

  1. No delays between trades
  2. No waiting time for materials
  3. No unexpected gaps in scheduling

So, when sending a dashboard link to a client, it’s worth mentioning that this should be read as a structured sequence rather than a guaranteed calendar. 

It’ll give homeowners a clear view of when disruption is likely to happen so they can plan around it. For example, during an extension build, they’ll be able to see roughly when the knock-through is scheduled, so they can plan for dust protection, access, or time away from the property.

Mobile Compatibility

The dashboard link is fully accessible on mobile devices as well as desktop, allowing homeowners to view project costs on the go. The experience is designed to be responsive across screen sizes, though some views are optimised for landscape mode. If prompted, rotating the device will help ensure the dashboard displays correctly and remains easy to navigate.

We’re always improving BuildPartner to make project pricing more transparent and help you keep clients better informed. If you have feedback on this feature or ideas for what would make it more useful, we’d love to hear from you. Please email us at [email protected]

Categories
Product Updates

Feature Overview: Inviting Contractors To Tender for Your Project

Inviting contractors to your project in BuildPartner makes it easy to request quotes and compare pricing side by side in one place. It brings all your tender activity into a single, centralised dashboard so nothing gets lost in email threads or spreadsheets. This guide explains how to invite contractors and streamline the quotation process from start to finish.

Finding and Filtering Suggested Contractors

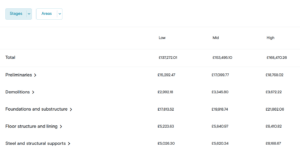
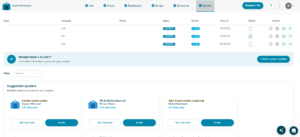
To get started, head over to the Quotes page. Beneath the benchmark costs (low, mid, and high estimates), you'll find a section titled Suggested Quoters. Here, you'll see a selection of contractor tiles displaying the company name, contractor name, and their distance from your project, based on the postcode you entered on the Info tab when creating your project.

Use the Filter: Distance dropdown to narrow your list of suggested contractors based on how close they are to your project. You can choose to display contractors within 5, 10, 25, or 50 miles.

Alternatively, scroll past the first few contractor tiles and click the View All button beneath them. This opens the list of suggested contractors, allowing you to browse businesses located up to 150 miles from your project.

Getting An Estimate

To get an estimate, start by reviewing the list of suggested contractors and carrying out your own independent research where helpful, such as checking platforms like Google, Trustpilot, and Checkatrade for reviews and ratings. This’ll help you narrow down a shortlist of suitable contractors.

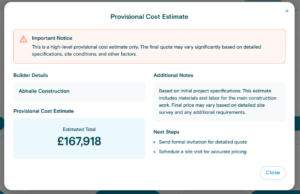
Once you’re ready, click Get Estimate to compare their pricing against your cost plan. This is a high-level, provisional estimate based on your initial project specifications, which includes materials and labour for the main construction work, but the final price may vary following a detailed site survey.

Inviting A Contractor To Quote

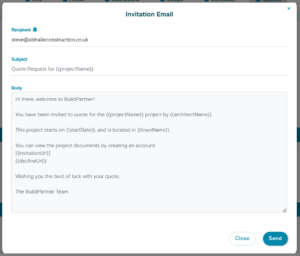
To invite a contractor to quote, click Invite on their tile. Nothing will happen immediately. A pop-up invitation email will appear, containing the contractor’s email address and a pre-written message body that cannot be edited, although you can edit the subject line if required. 

In the body of the email, you may notice custom values, e.g., {{projectName}}. These are automatically pulled from your project’s Info page. Once you’re happy with the details, click Send to send the invitation.

Already Have A Contractor In Mind?

If you already know a contractor, click the + Add custom builder button. A field will appear where you can enter the contractor’s email address and send the invite. They can then submit a quote for your project using BuildPartner’s functionality, even if they are not a paying subscriber.

Once contractors submit a quote through BuildPartner, they’ll appear on your Quotes page, where you can compare them using the Compare Quotes button. You can view a full breakdown of each quote by stage or area, and drill down into individual tasks for a detailed view.

We’re continuously refining BuildPartner to make quoting, comparison, and contractor collaboration more transparent and reduce friction. Let us know how you’re finding things or what you’d like to see by emailing us at [email protected]


Categories
Product Updates

New Feature: BuildPartner AI Chatbot – Your Project Assistant

Product Updates15 June 2026

New Feature: BuildPartner AI Chatbot – Your Project Assistant


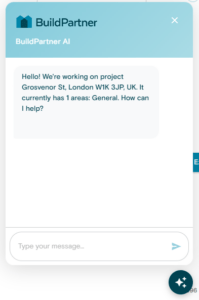
Introducing our newest feature, the BuildPartner AI Chatbot! It’s built directly into your project and acts as an intelligent assistant to manage schedules, update project areas, review costs, define scopes of work, and retrieve key project information. 

Instead of navigating through multiple screens or manually making changes, you can simply tell the chatbot what you need, and it’ll take care of the rest. The result is less admin, faster project management, and more time to focus on delivering the job.

To get started, look for the AI widget (three stars ✨) in the bottom-right corner of your screen and click it to open the chatbot. Here’s an overview of what it can do for you.

1. Manage Project Areas

Using the AI chatbot, you can directly manage your project areas.

Your schedule is built around “areas” like rooms, extensions, and other parts of the build; and with the chatbot, you can add a new area, change an existing one, or remove something completely just by telling it what you want.

It handles the updates instantly, keeping your schedule accurate without you having to dig through pages/tabs or without you needing to manually rebuild anything.

For example:

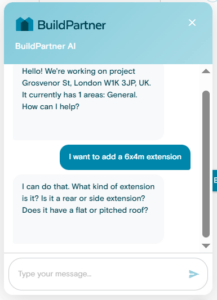
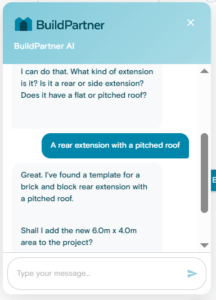
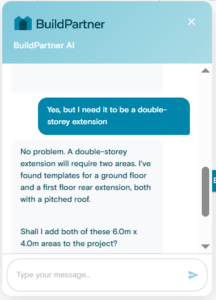
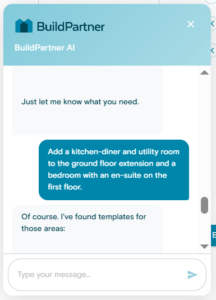
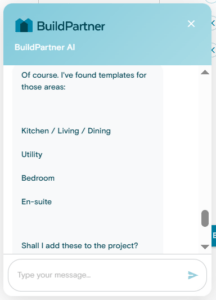
  1. Add New Areas. “I want to add a new bathroom” or “a 3m x 2m bathroom.” The AI pulls in a ready-made template with all standard tasks and materials, from demolition and first-fix plumbing through to tiling and paint.
  2. Update Dimensions. “The GF rear extension is now 6.5m x 4.5m.” The system automatically updates all linked quantities, recalculating floors, walls, ceilings, and all related materials like insulation, plasterboard, skirting, and paint.
  3. Remove Areas from the Project. “We’ve decided against the en-suite, please remove it.” Once confirmed, the AI removes the area along with all associated tasks, materials, and costs from the project.

The AI will always ask you to confirm before deleting anything. 


The AI will also prompt you for missing information when needed. If your request is incomplete, it won’t guess. It will ask for clarification to make sure everything is accurate.

So, if you ask to add an extension, it will guide you through the setup by confirming details like whether it’s a front, side, or rear extension, and then ask for the dimensions.

2. Manage Schedule Tasks

The AI can also manage the schedule tasks, that is, getting into the fine details of the project, item by item, within a specific room or area. It can:

  1. Add a Task. Add missing items to a template (e.g. “install a boiling water tap” in a kitchen).
  2. Update a Task. Change quantities or specs instantly (e.g. 6 downlights to 10, or swap “magnolia” paint for a specific Farrow & Ball colour).
  3. Delete a Task. Remove anything you don’t need (e.g. a heated towel rail).


In short, it lets you micromanage the to-do list for any area, ensuring the schedule is a perfect match for the specific requirements of your job.

3. Review Project Costs

The AI chatbot can also help you review project costs across your project or individual areas, giving you clear visibility of labour, materials, and profit.

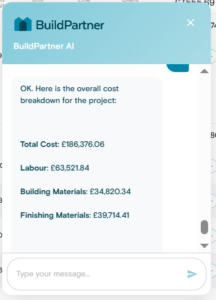
  1. Cost Breakdown. See the full project price broken down into labour, materials, and profit/margin. You can request this for the whole project or a specific area, e.g. “total cost of the en-suite”.
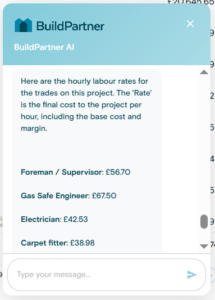
  2. Labour Rates. View hourly rates for each trade (e.g. plumber, electrician), so you can understand exactly how labour costs are built up.


It’s handy for giving you a clear, transparent view of your project’s finances without having to do any investigation.

4. Manage Scope of Works

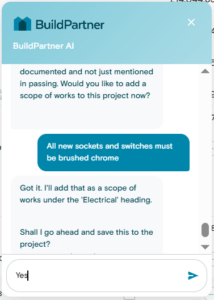
The AI chatbot can also help you manage the scope of works. You can add any specific details you want included in the build. For example:

  1. “All new sockets and switches must be brushed chrome.” 
  2. “I want underfloor heating throughout the ground floor extension.” 
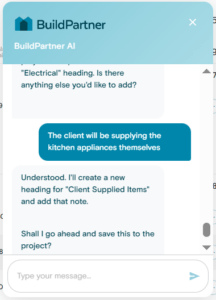
  3. “The client will be supplying the kitchen appliances themselves.”
  4. “The existing boiler will be reused and does not need to be replaced.”

The AI will then group these items under logical headings like "Electrical," "Plumbing," "Finishes," or "Client Supplied Items".

5. Answer Project Questions

The AI chatbot can act as your single point of reference for key project information, giving you instant access to the data you need.

  • Answer Project Questions. Get key project details like address, spec level, key dates.
  • Project Basics. Retrieve the full address, client name, or project reference number.
  • Quality and Scope. Check spec level (Standard, Basic, High) and original summary of works.
  • Project Files. See how many documents (plans, reports, photos) are attached.

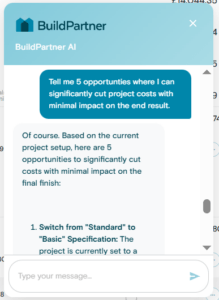
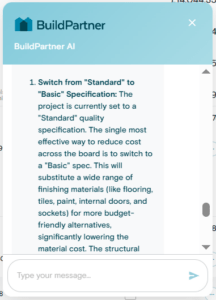
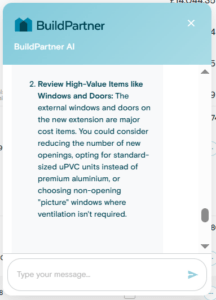
It can also help you make better decisions on the job by suggesting cost-saving options or highlighting where small changes could add value to the build.

6. Project Creation

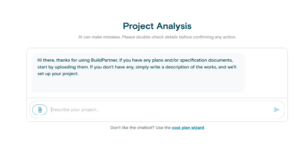
At the outset, when creating your project, you’ll be presented with an option to describe your project and upload any corresponding attachments for plans.

For instance, if you tell it you’re building an extension, the chatbot will ask you a series of questions about it in order to gather accurate prices, including the postcode of the project.

Or if you prefer, you can always use the cost plan wizard to select your project elements.

This is a new feature, so please let us know if you run into any issues. We welcome feedback and are always keen to hear how we can improve BuildPartner.

Get an accurate cost estimate instantly

BuildPartner gives you detailed, location-specific construction costs in minutes.

    Categories
    Estimation Software Product Updates

    Introducing AI Plan Reading In BuildPartner: Faster, Smarter Cost Estimates

    Introducing AI Plan Reading In BuildPartner: Faster, Smarter Cost Estimates
    Estimation Software20 January 2026

    Introducing AI Plan Reading In BuildPartner: Faster, Smarter Cost Estimates

    A few weeks ago, we quietly introduced AI Plan Reading, a major new capability that changes how cost plans and quotations are created inside BuildPartner. Instead of manually entering information from drawings or working from rough assumptions, users can now upload their plans and let BuildPartner interpret them automatically.

    This is a significant milestone for us and a major step forward in our mission to remove friction from construction cost estimating. Our new AI Plan Reading feature helps architects, contractors, property developers and managers move from drawings to reliable cost insight faster, with far less effort.

    So, how does it work?

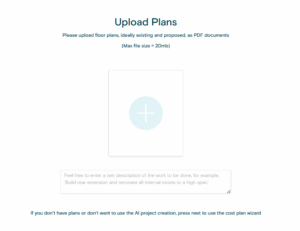
    Uploading Your PDF Plans

    Log in to your BuildPartner account and create a new project. You’ll be taken to a new screen where you can upload your plans. (If you don’t have plans, you can proceed by clicking “Next”, and you’ll then see the usual screens where you can select the project type, shells, rooms, etc.).

    When uploading plans, there’s also an optional field to describe the scope of the project, such as:

    • Build a rear extension and renovate all rooms to a high specification
    • Build a new four-bedroom detached house with integrated garage 
    • Convert existing loft into a master bedroom with en-suite
    • Construct a new front porch with improved insulation and glazing
    • Build a double garage with storage space and electric vehicle charging

    At the moment, only PDF files are supported for plan uploads. 

    Let BuildPartner Do The Heavy Lifting

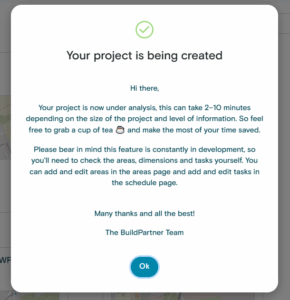
    Once uploaded, BuildPartner will analyse your plans, which can take between 2 and 10 minutes.

    When the process is complete, you’ll receive two notifications: one to your email and another in the browser app.

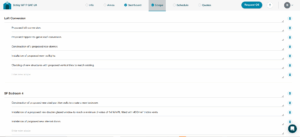
    The Scope Tab

    There’s a new tab where you can review the scope of your project to make sure AI Plan Reading has captured the information correctly. At the moment, this is for reference only. In the next feature update, this tab will allow the schedule to be updated automatically.

    But for now, removing a line using the dustbin icon won’t affect the schedule, nor does entering new scope information in the free-text field.

    Reviewing The Area & Schedule Tab

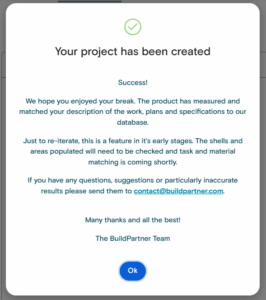
    As with any project, it’s important to review all the details in the schedule carefully. This feature is still in its early stages, so shells and areas should be checked to ensure accuracy. If you have any questions or need further guidance, please contact us at [email protected].

     

    Get an accurate cost estimate instantly

    BuildPartner gives you detailed, location-specific construction costs in minutes.

      Categories
      Product Updates Blog

      Notice: BuildPartner Updated Labour Rates

      Notice: BuildPartner Updated Labour Rates
      Product Updates14 March 2025

      Notice: BuildPartner Updated Labour Rates

      January 25th, 2025

      We’ve recently reviewed and updated our average labour rates (bricklayer, plumber, electrician, plasterer, etc.) so that BuildPartner reflects the latest industry trends. As a result, benchmark rates for existing and new projects have automatically updated. 

      These changes do not override the default rates that you may have set up when creating your BuildPartner account. You may want to consider changing your own default rates.

      For more details on the changes and how to update your default rates, read on below.

      Overview Of Changes

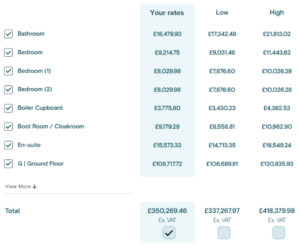
      When you create a project, on your Dashboard, you’ll notice three columns summarising a breakdown of cost by project area. These three columns represent:

      • Your rates – the rates you set up on account creation.
      • Low – the average regional rates of smaller, less-specialised contractors.
      • High – the average regional rates of larger, specialist contractors.

      (On the Quote page, you can also access Mid rates—the rates of medium-sized contractors that offer a balanced mix of cost-effectiveness and specialisation.)

      Different rates

      Low, Mid, and High rates are determined by our central default prices.

      Given that we’ve recently updated our average labour rates per region, it’s important to be aware that these changes (to Low, Mid, and High rates) will automatically update for:

      • Existing projects
      • New projects

      “Your rates” will not update automatically, so you may want to consider changing them. For more details on how to do this, read the section below.

      Comparison Of Labour Rates Year On Year

      Here’s an example of the average rates for 2024 for a selection of contractors in three regions: 

      2024 Average Labour Rates
      Region Bricklayer Carpenter Electrician Gas Safe Engineer Plasterer Plumber
      Greater London £207  £224  £263  £332  £204  £236 
      Inner London £201  £229  £260  £337  £202  £232 
      South East £199  £218  £256  £318  £201  £234 
      South West £196  £200  £232  £294  £183  £229 
      Wales £167  £183  £223  £284  £166  £185 
      Scotland £164  £199  £249  £317  £164  £214 
      Midlands £181  £193  £228  £266  £174  £198 
      East Anglia £182  £196  £234  £289  £175  £225 
      North West £170  £182  £225  £257  £173  £199 
      North East £185  £197  £235  £263  £177  £208 
      Northern Ireland £185  £197  £235  £263  £177  £208 
      Rep. of Ireland £149  £169  £202  £252  £149  £169 

      And here’s how they look for 2025: 

      2025 Average Labour Rates
      Region Bricklayer Carpenter Electrician Gas Safe Engineer Plasterer Plumber
      Greater London £215  £223  £261  £328  £207  £237 
      Inner London £206  £234  £261  £337  £212  £242 
      South East £208  £222  £261  £319  £206  £240 
      South West £194  £197  £229  £296  £185  £221 
      Wales £162  £163  £216  £268  £160  £178 
      Scotland £172  £204  £247  £267  £165  £214 
      Midlands £181  £186  £222  £267  £167  £190 
      East Anglia £193  £193  £236  £285  £179  £219 
      North West £164  £175  £213  £263  £157  £181 
      North East £156  £179  £216  £255  £158  £180 
      Northern Ireland £179  £196  £220  £232  £191  £196 
      Rep. of Ireland £139  £158  £189  £252  £139  £158 

      Overall, labour rates have changed by:

      Percentage Change
      Region Bricklayer Carpenter Electrician Gas Safe Engineer Plasterer Plumber
      Greater London 4% -1% -1% -1% 1% 1%
      Inner London 3% 2% 0% 0% 5% 4%
      South East 4% 2% 2% 0% 2% 3%
      South West -1% -2% -1% 0% 1% -3%
      Wales -3% -11% -3% -6% -3% -4%
      Scotland 5% 2% -1% -16% 1% 0%
      Midlands 0% -3% -3% 1% -4% -4%
      East Anglia 6% -1% 1% -1% 2% -3%
      North West -4% -4% -5% 2% -9% -9%
      North East -16% -9% -8% -3% -10% -14%
      Northern Ireland -3% -1% -7% -12% 8% -6%
      Rep. of Ireland -7% -6% -7% 0% -7% -6%

      Not all trades are included in this list. Log in to view full trades and their respective rates.

      How To Amend Your Default Labour Rates

      There are two ways to amend your labour rates:

      1. By amending the default rates of a specific project.
      2. By amending the default rates for all projects (existing and new).

      1. Set Rates For A Specific Project

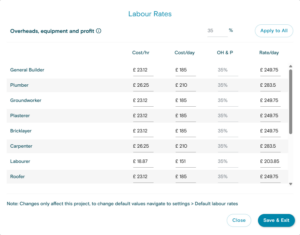
      If you want to set the default rates for a specific project, open the project in question and head to the Schedule tab. Then, click the GBP icon (£) and select Labour.

      edit rates

      You’ll then be presented with a window where you can manually change the Cost/hr or Cost/day (amending one automatically changes the other). You can then apply an additional percentage for overheads and profit (OH&P) which updates the Rate/day field.

      When you’ve entered your rates for this specific project, click Save & Exit.

      2. Set Default Rates For All Projects (Existing and New)

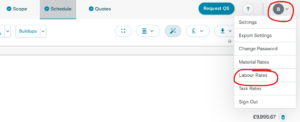
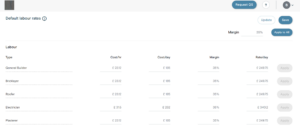
      To set default labour rates for all projects—including existing and newly created projects—hover over your account initials in the upper-right-hand corner of the screen to reveal your account settings. Then, select Labour Rates.

      On the page, you can amend the labour rates for all respective trades (bricklayer, plumber, electrician, plasterer, etc.). 

      Important! These rates will be applied to all newly created projects and existing projects.

      Any Queries About Our Labour Rates?

      We hope this provides you with insight into the changes happening behind the scenes to keep pricing as up-to-date and accurate as possible.

      If you have any issues or questions regarding these updates, feel free to contact us at [email protected]. We’re happy to help.

      Get an accurate cost estimate instantly

      BuildPartner gives you detailed, location-specific construction costs in minutes.

        Categories
        Product Updates Blog

        How To Calculate Building Costs Per Square Metre In Minutes Using BuildPartner

        How To Calculate Building Costs Per Square Metre In Minutes Using BuildPartner
        Product Updates23 August 2023

        How To Calculate Building Costs Per Square Metre In Minutes Using BuildPartner

        If you’re building a house, or undertaking any construction project, you need to calculate accurate costs per square metre accurately. Let’s face it, most of us have been in those situations where we’ve miscalculated a project and overspent. 

        You’ve probably seen those enthusiastic first-time investors on Location, Location, Location or Homes Under the Hammer – those who eagerly reveal their unrealistic budgets and are forced to eat their words when revealing their actual spending.

        While it’s entertaining to watch (and laugh), it happens to the best of us… 

        But with building pricing software, you can slash the risk of overspending and get accurate building costs per square metre in just a matter of minutes. Best of all? It costs you nothing to get started, and estimation software is not as technical as you think. 

        Benefits Of Using Construction Estimation Software

        We hate to break it to you, but if your preferred method of calculating building costs is punching a load of numbers into a spreadsheet (or jotting down on the back of a fag packet), you’re missing out and it’s costing you a small fortune.

        Using a spreadsheet to work out building costs is the equivalent of core drilling a hole with a 12v combi drill. You wouldn’t even dream of it. And whilst you might get there eventually, you wouldn’t without a fair few expletive-laden rants.

        Construction estimation software is like the diamond bit for quoting a project – the tool you need to get the job done properly. Here are the main benefits of using building estimating software:

        • Get a full itemised breakdown of cost options in a matter of minutes, slashing the administration time associated with quoting each project. 
        • Unlock cost savings by tweaking the specification to your specific needs. No need to overspend on inessential materials.
        • More options for customers to choose from with a comprehensive list of à la carte-style selections. Products and prices automatically pull through!
        • Greater accuracy and never let a single item go unaccounted for. Ever accidentally missed something off a quote? Nightmare. 
        • Transparency for both the contractor and customer, meaning less chance of scope creep.

        Five Simple Steps To Working Out Your Total Building Cost Per Square Metre

        In five simple steps, we’re going to learn how to calculate the costs of our construction project using BuildPartner. If you haven’t yet signed up for a free trial, try it out free today by clicking here. No credit card details required!

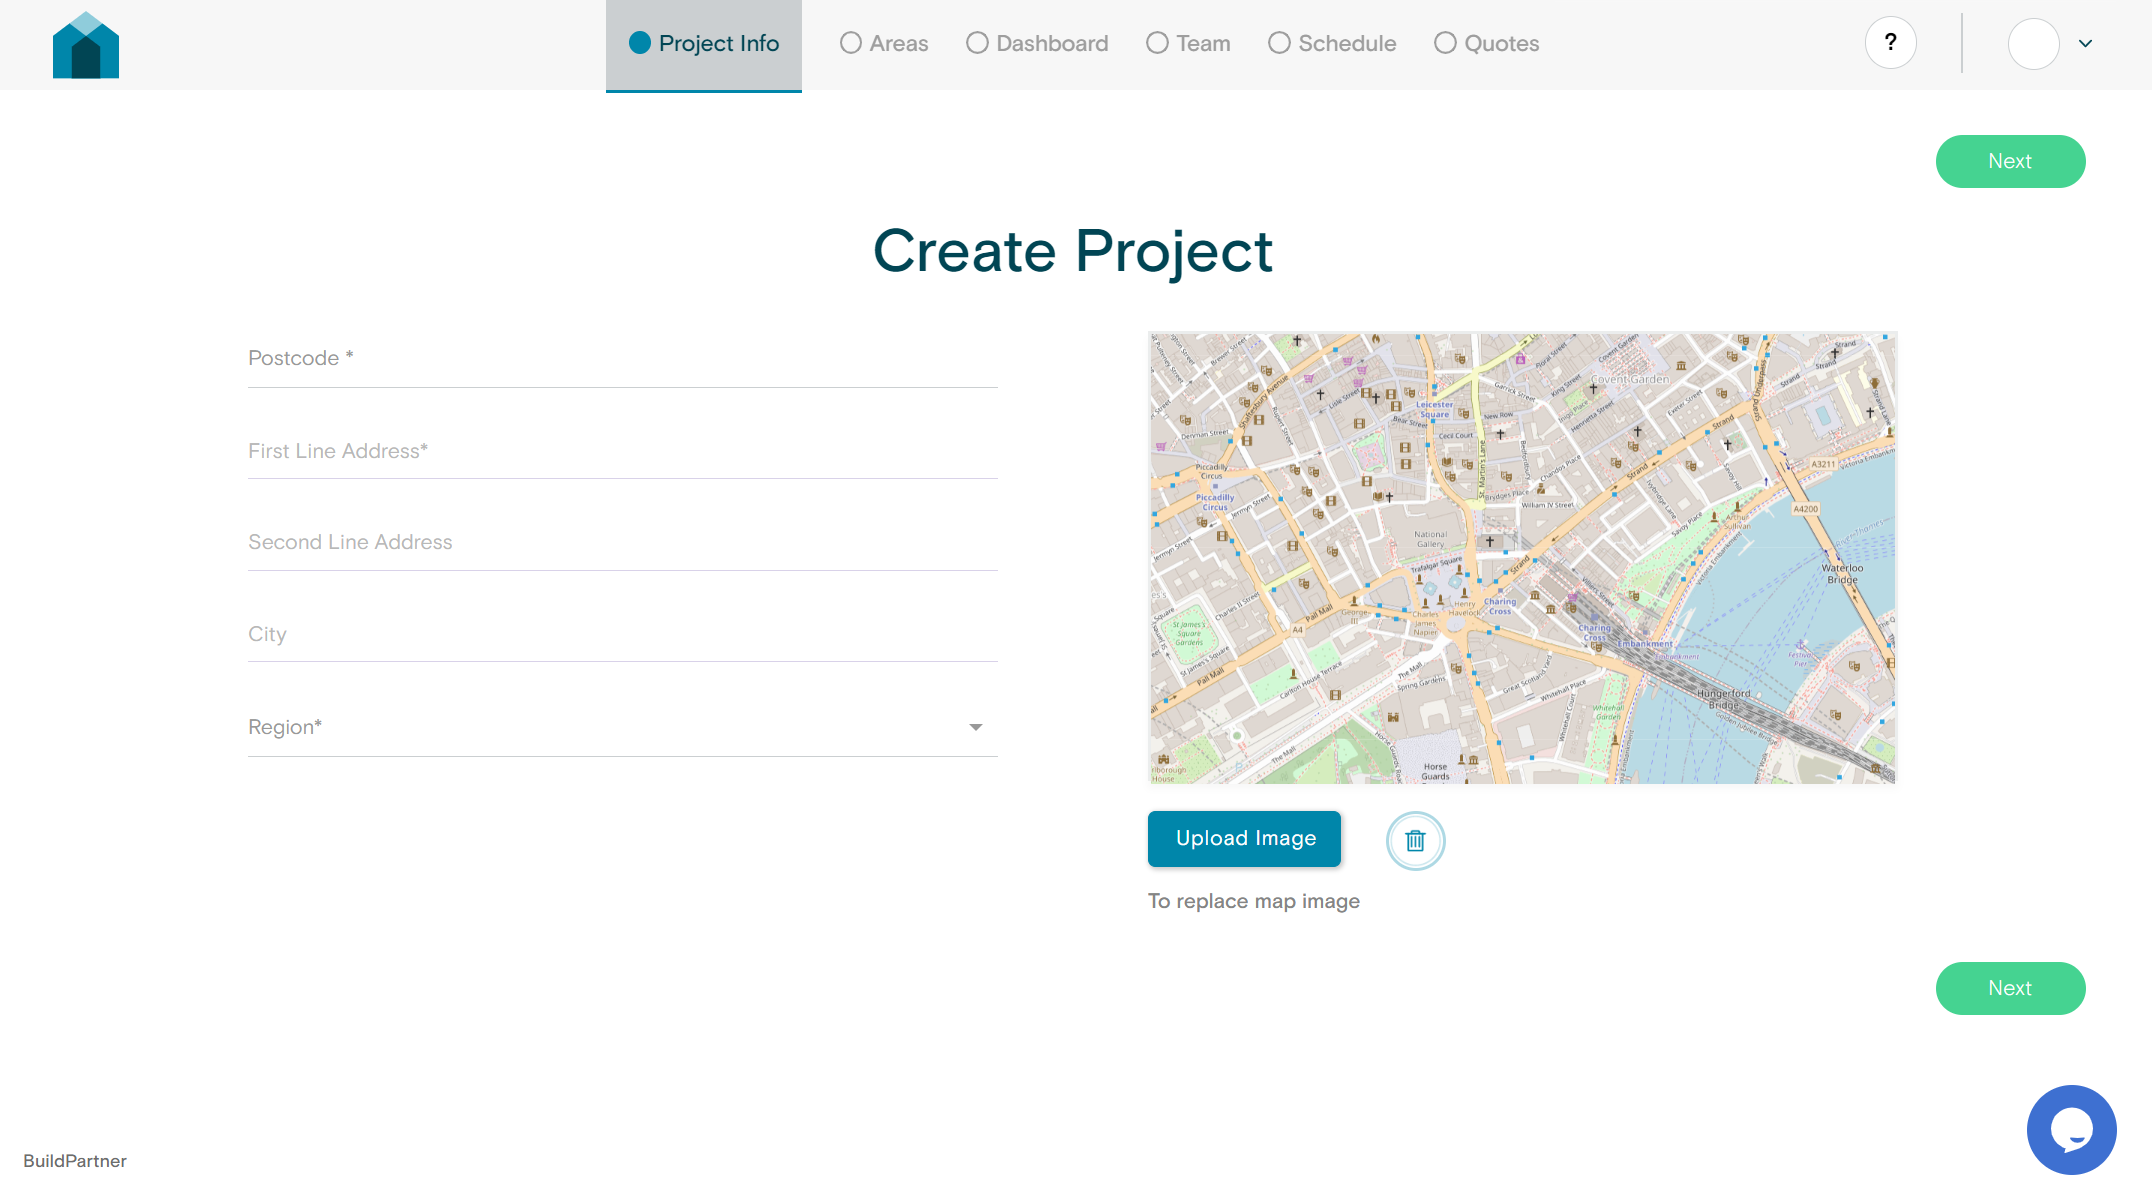
        1. Enter Your Project Location

        Start by inserting the address of the construction site, which determines the market data rates. Then click “Create Cost Plan”.

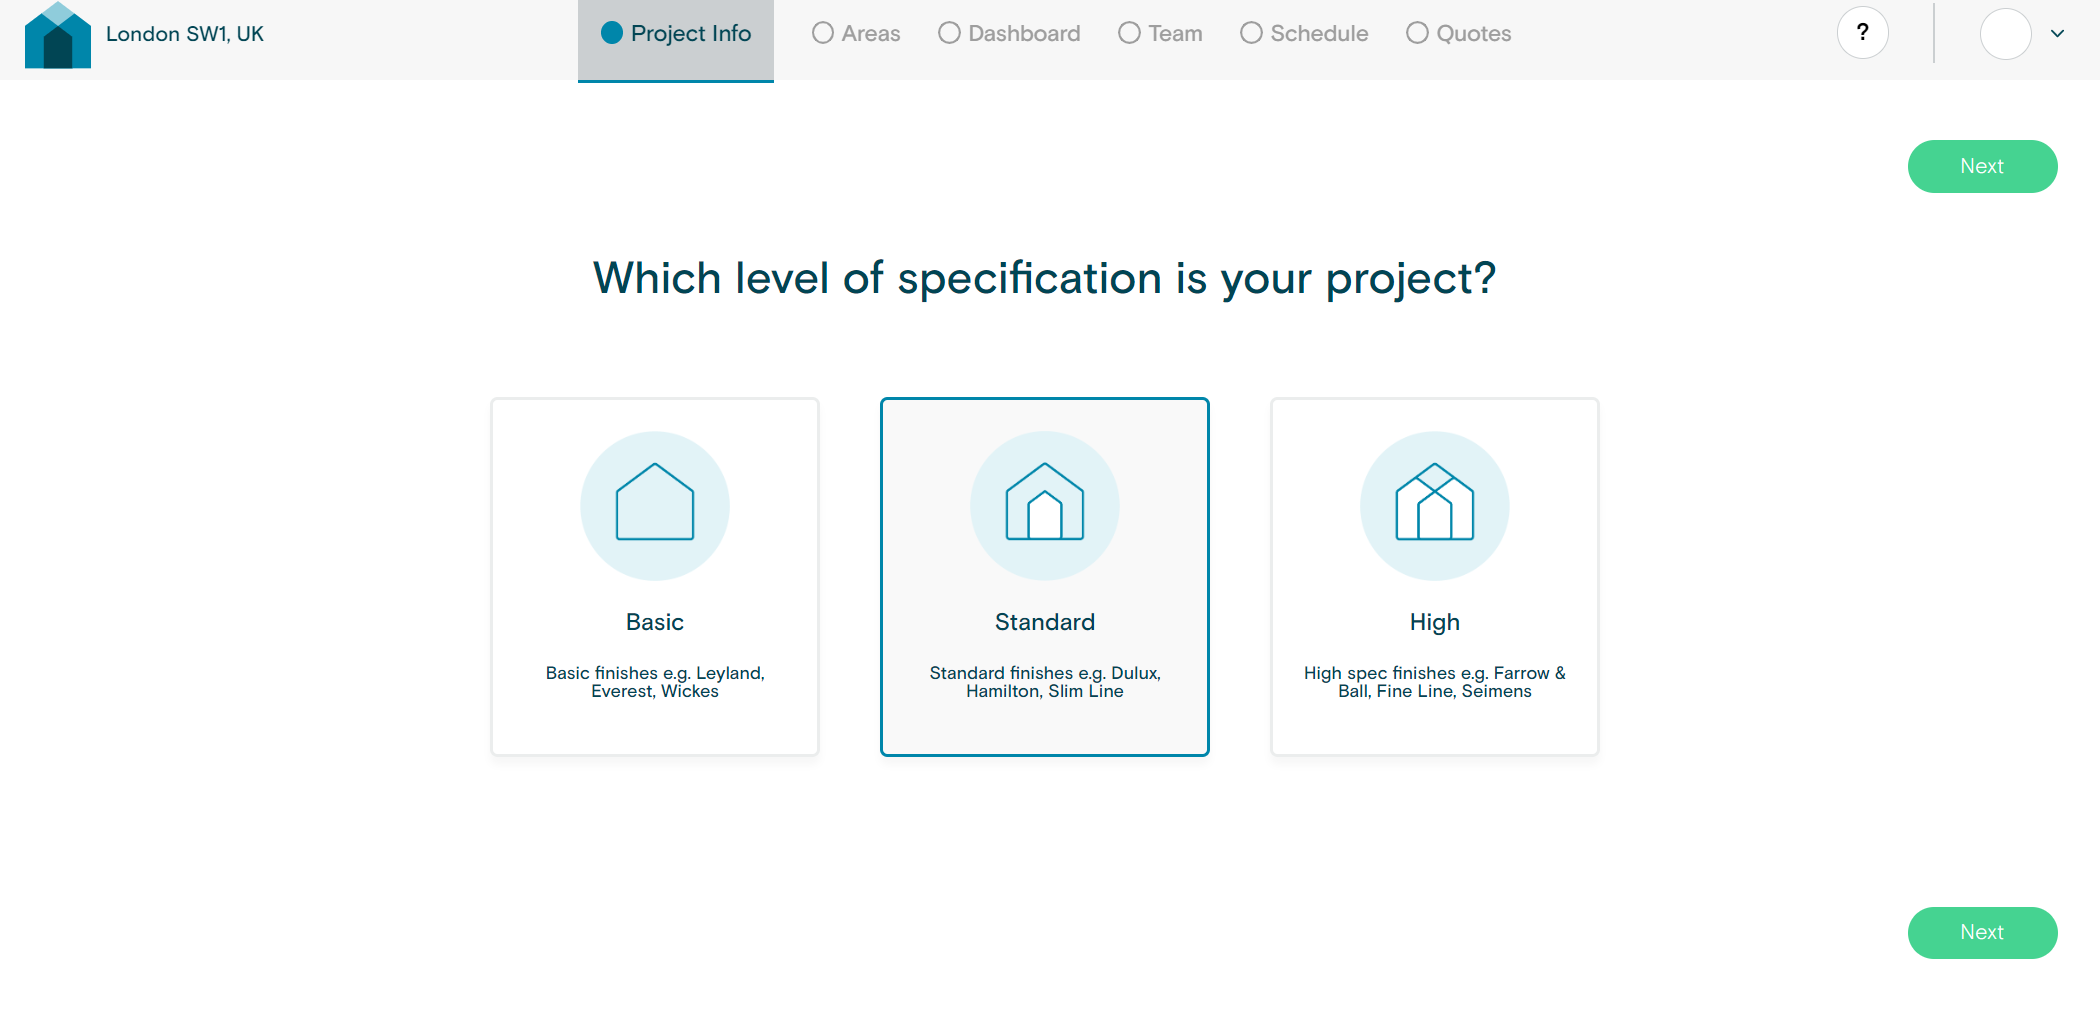
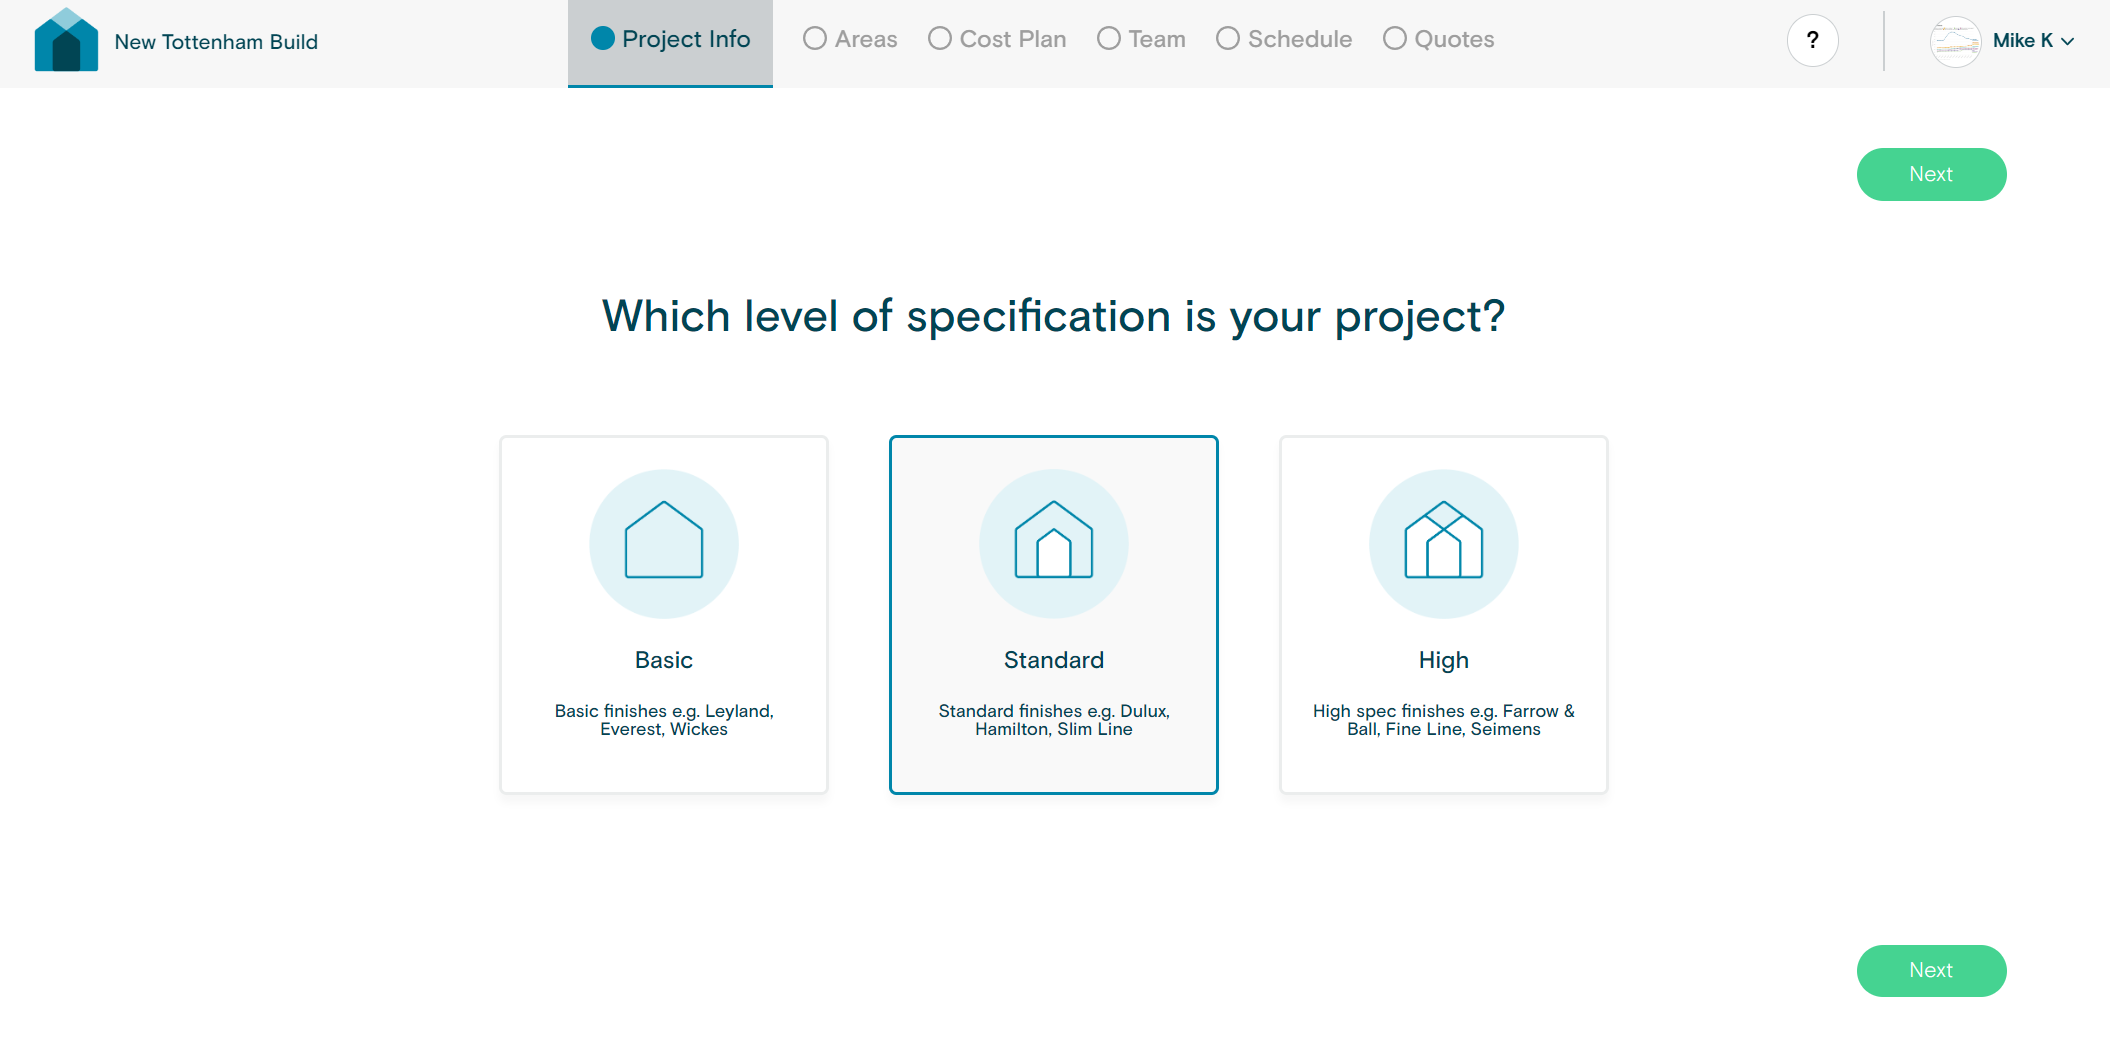
        2. Choose The Specification Of Your Build Project

        The next step is deciding what material, or rather specification, we want for the construction project. 


        Basic: basic finishes, e.g., Leyland, Everest, Wickes.

        Standard: standard finishes, e.g., Dulux, Hamilton, Slim Line.

        High: high-spec finishes, e.g., Farrow & Ball, Fine Line, Siemens.

        Your choice mainly affects finishings. Remember, you can always change individual elements further down the line in the drop-down style selections of the itemised overview.

        3. Choosing The Scope Of Your Build Project

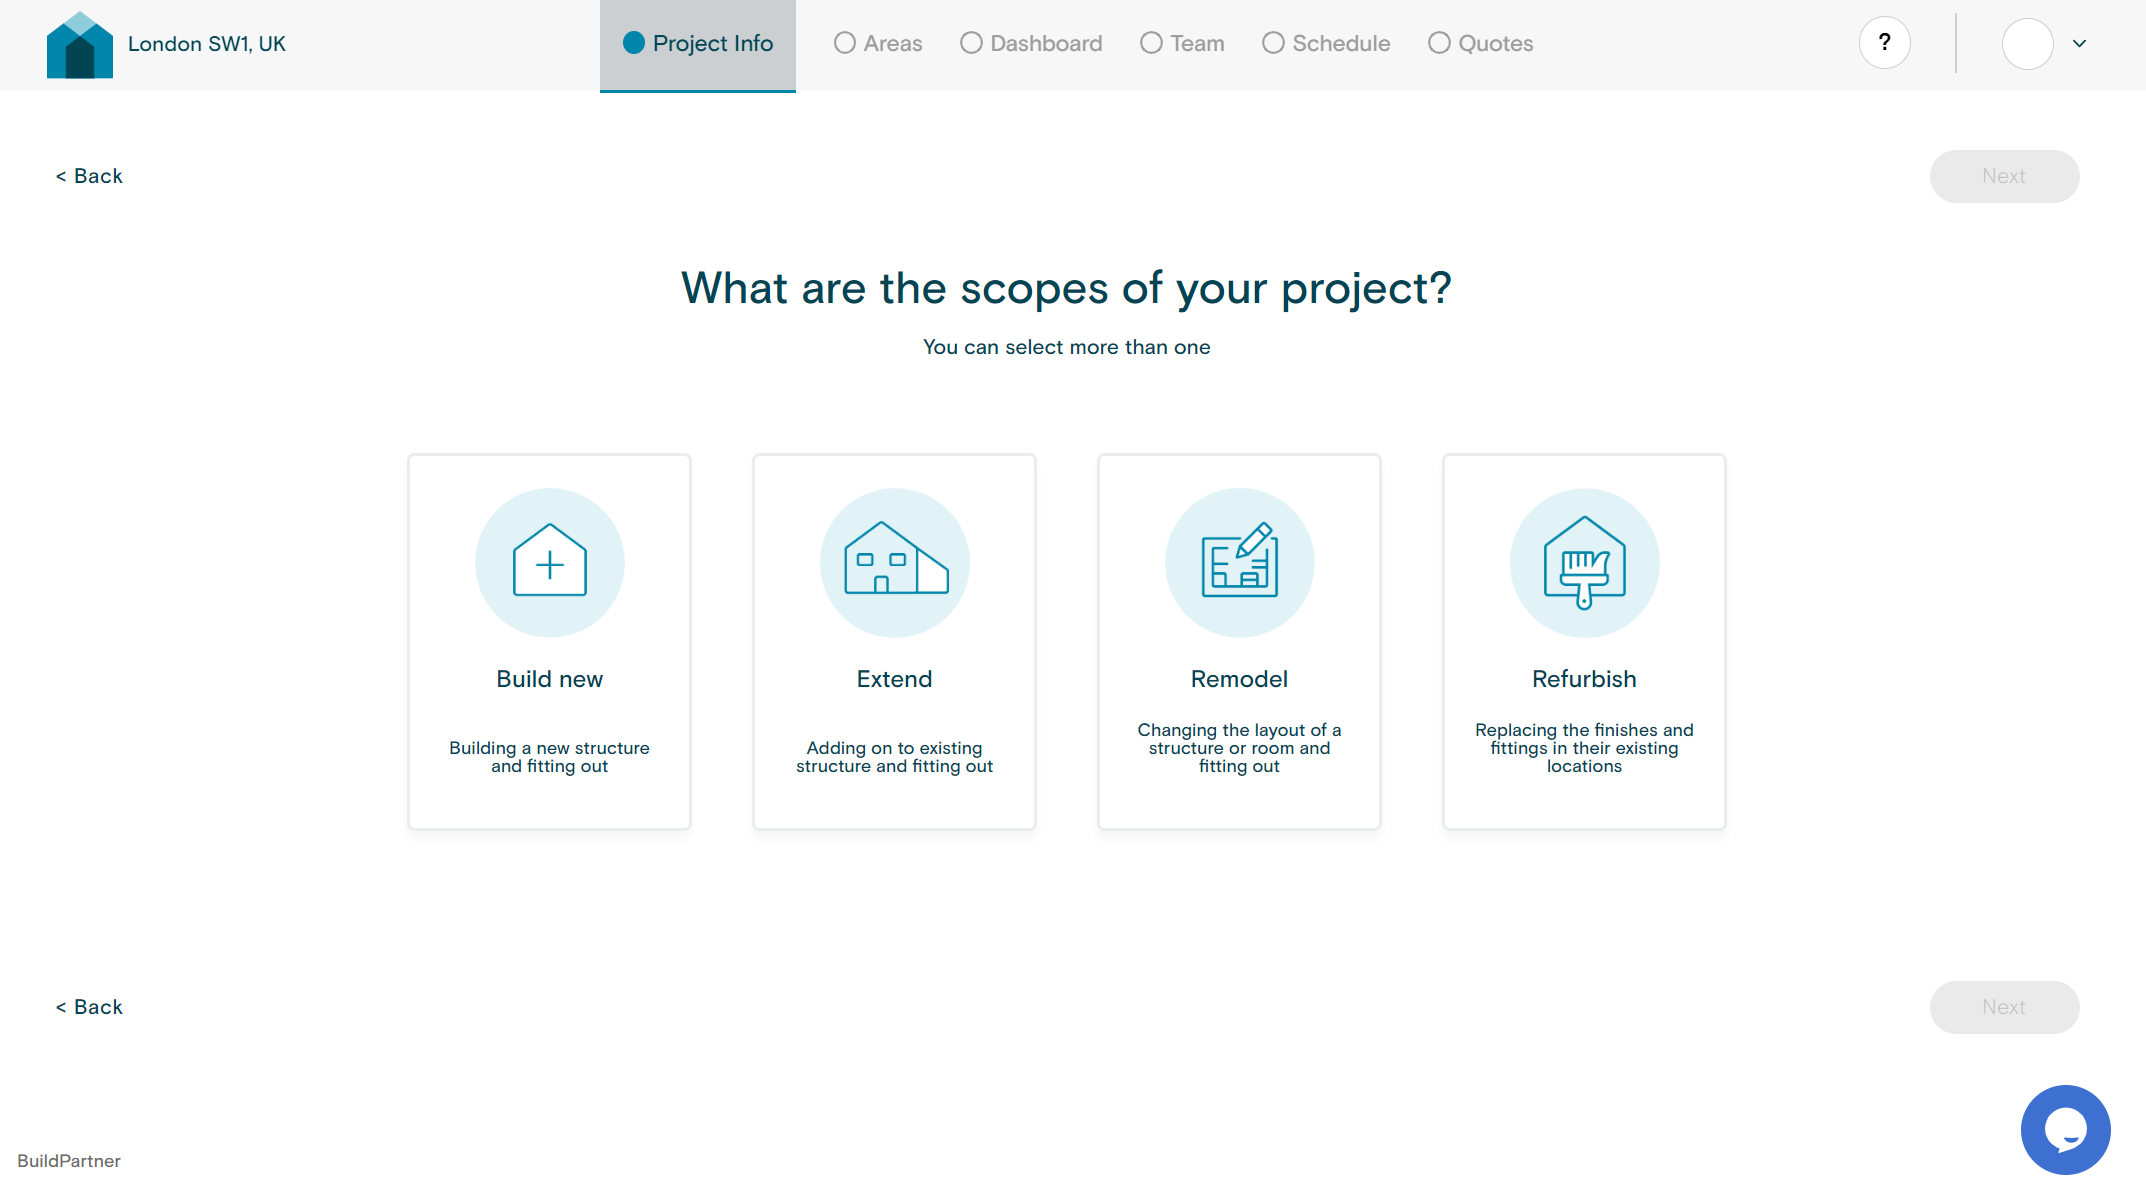
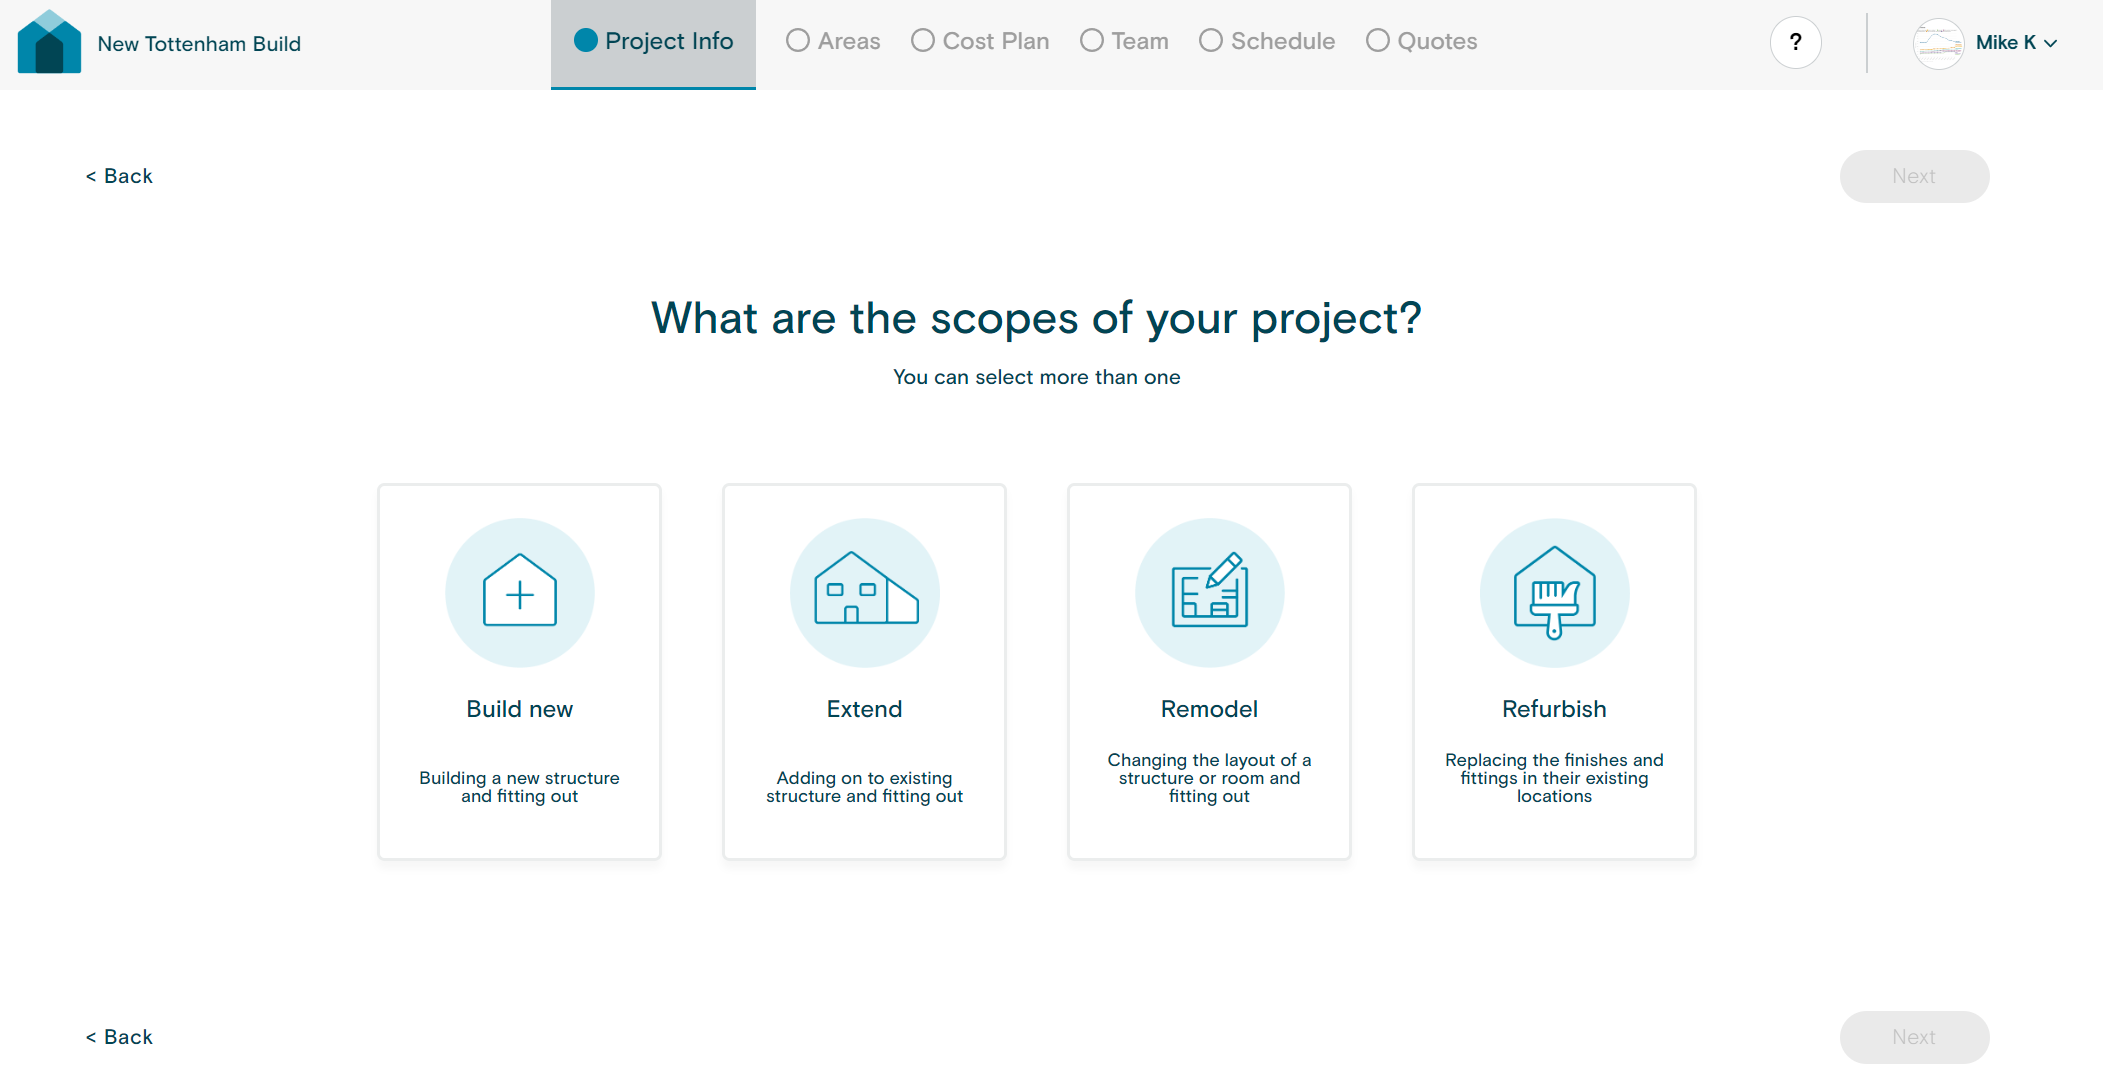
        Next, we choose the scope of the project. You can select from one or more of the following options.


        Build new: building a new structure and fitting out.

        Extend: Adding on to existing structure and fitting out.

        Remodel: Changing the layout of a structure or room and fitting out.

        Refurbish: Replacing the finishes and fittings in their existing locations.

        your first time using BuildPartner construction estimation software, we recommend you select one option to keep things simple.

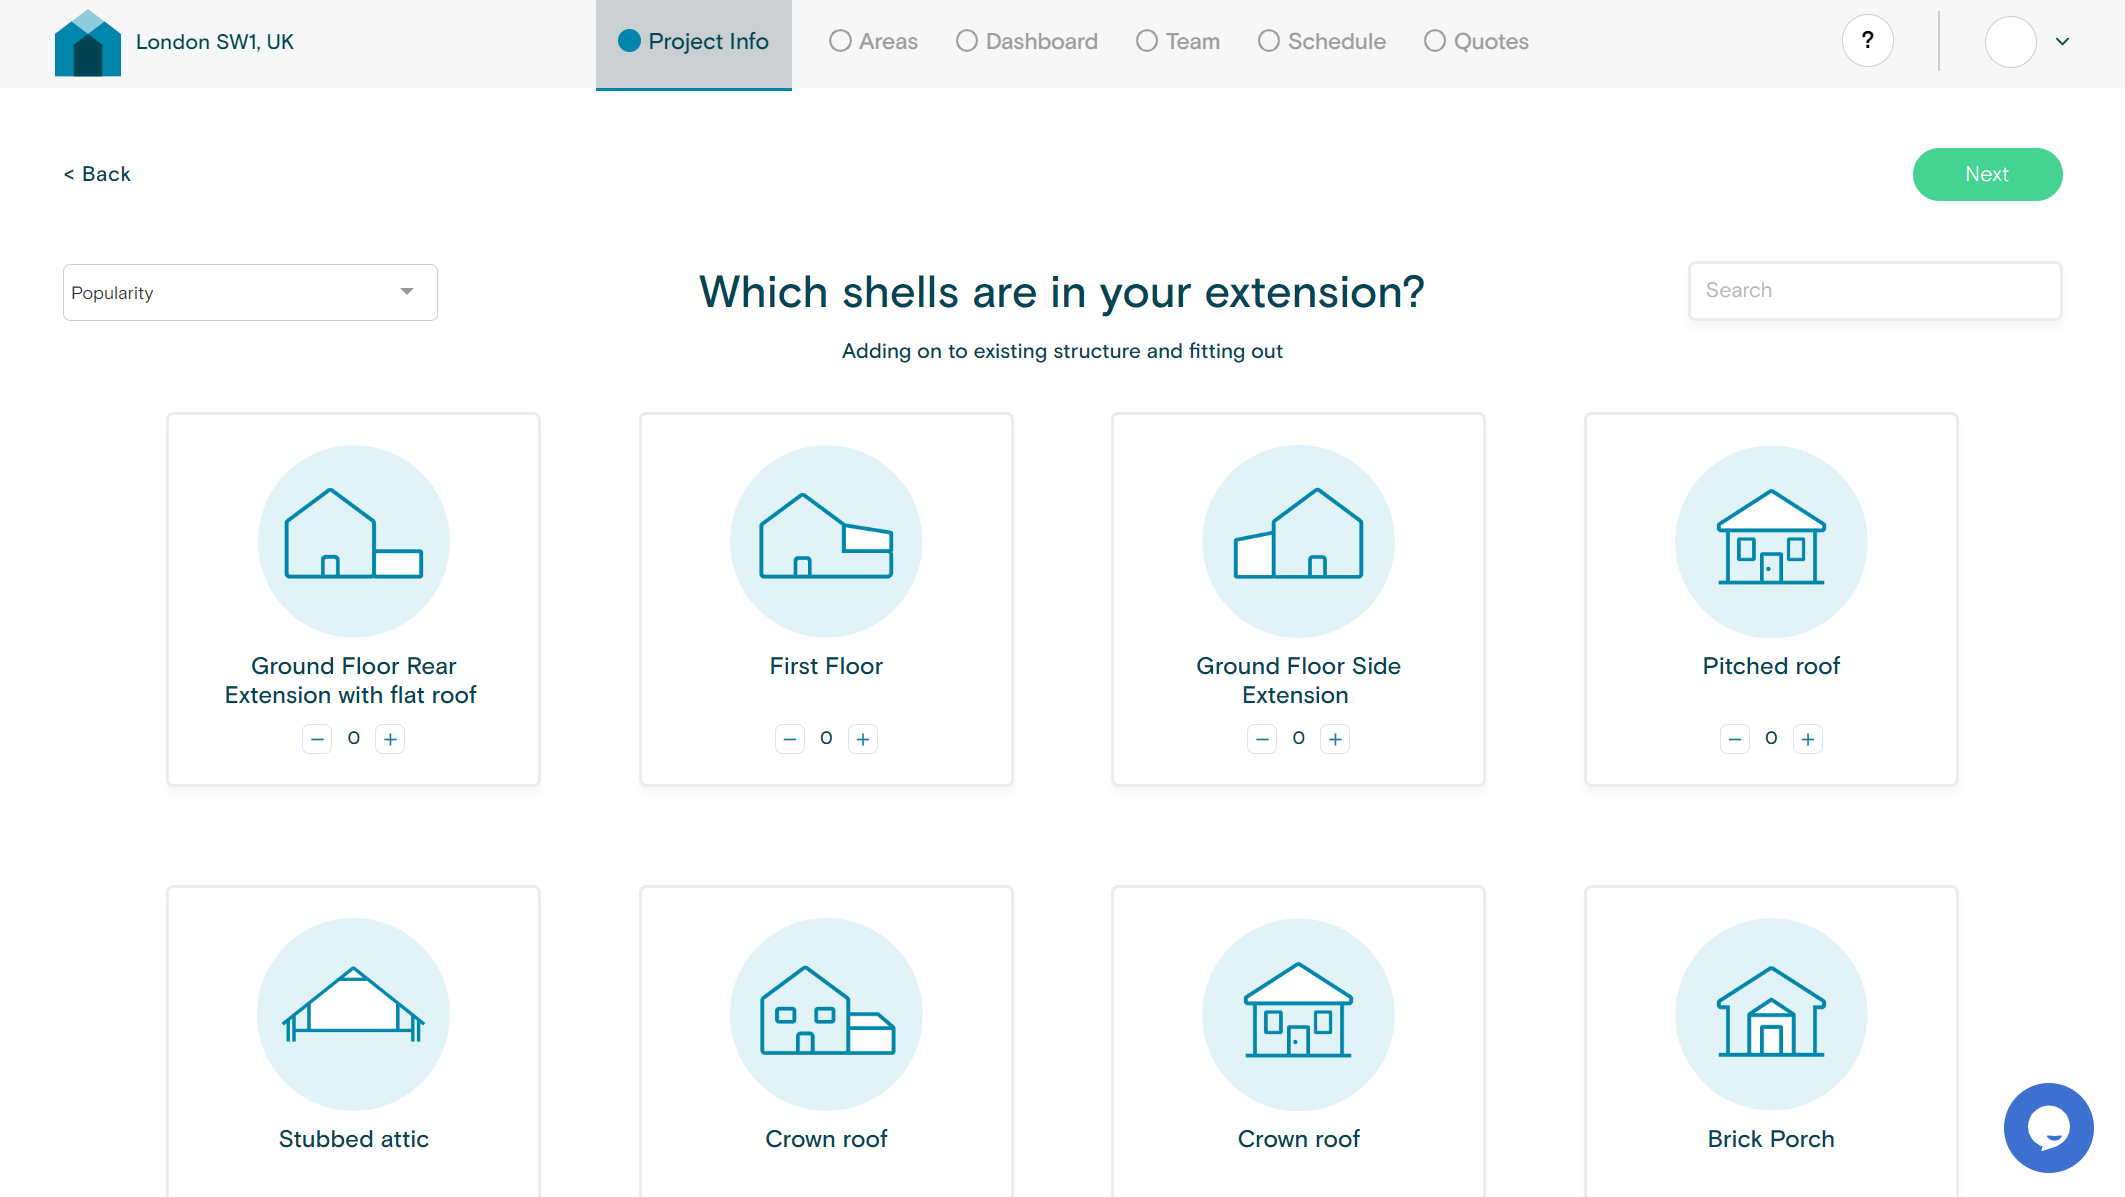
        4. Selecting Shells

        Then we select our “shells”, or the structures that will be included in the construction project.


        You can select from over 25 options:


        Ground floor; pitched roof; stubbed attic; crown roof; middle floor; top floor; brick porch; dormer window; flat roof; garden studio; external storage; ground floor bay window; garage; car port; pillar supported balcony; render porch; timber porch; two-storey house (2, 3, & 4 bed); basement; pricing clarifications; open porch; hip-to-ground-floor gable extension; bungalow.


        Select all those that apply and their quantities and click “Next”.

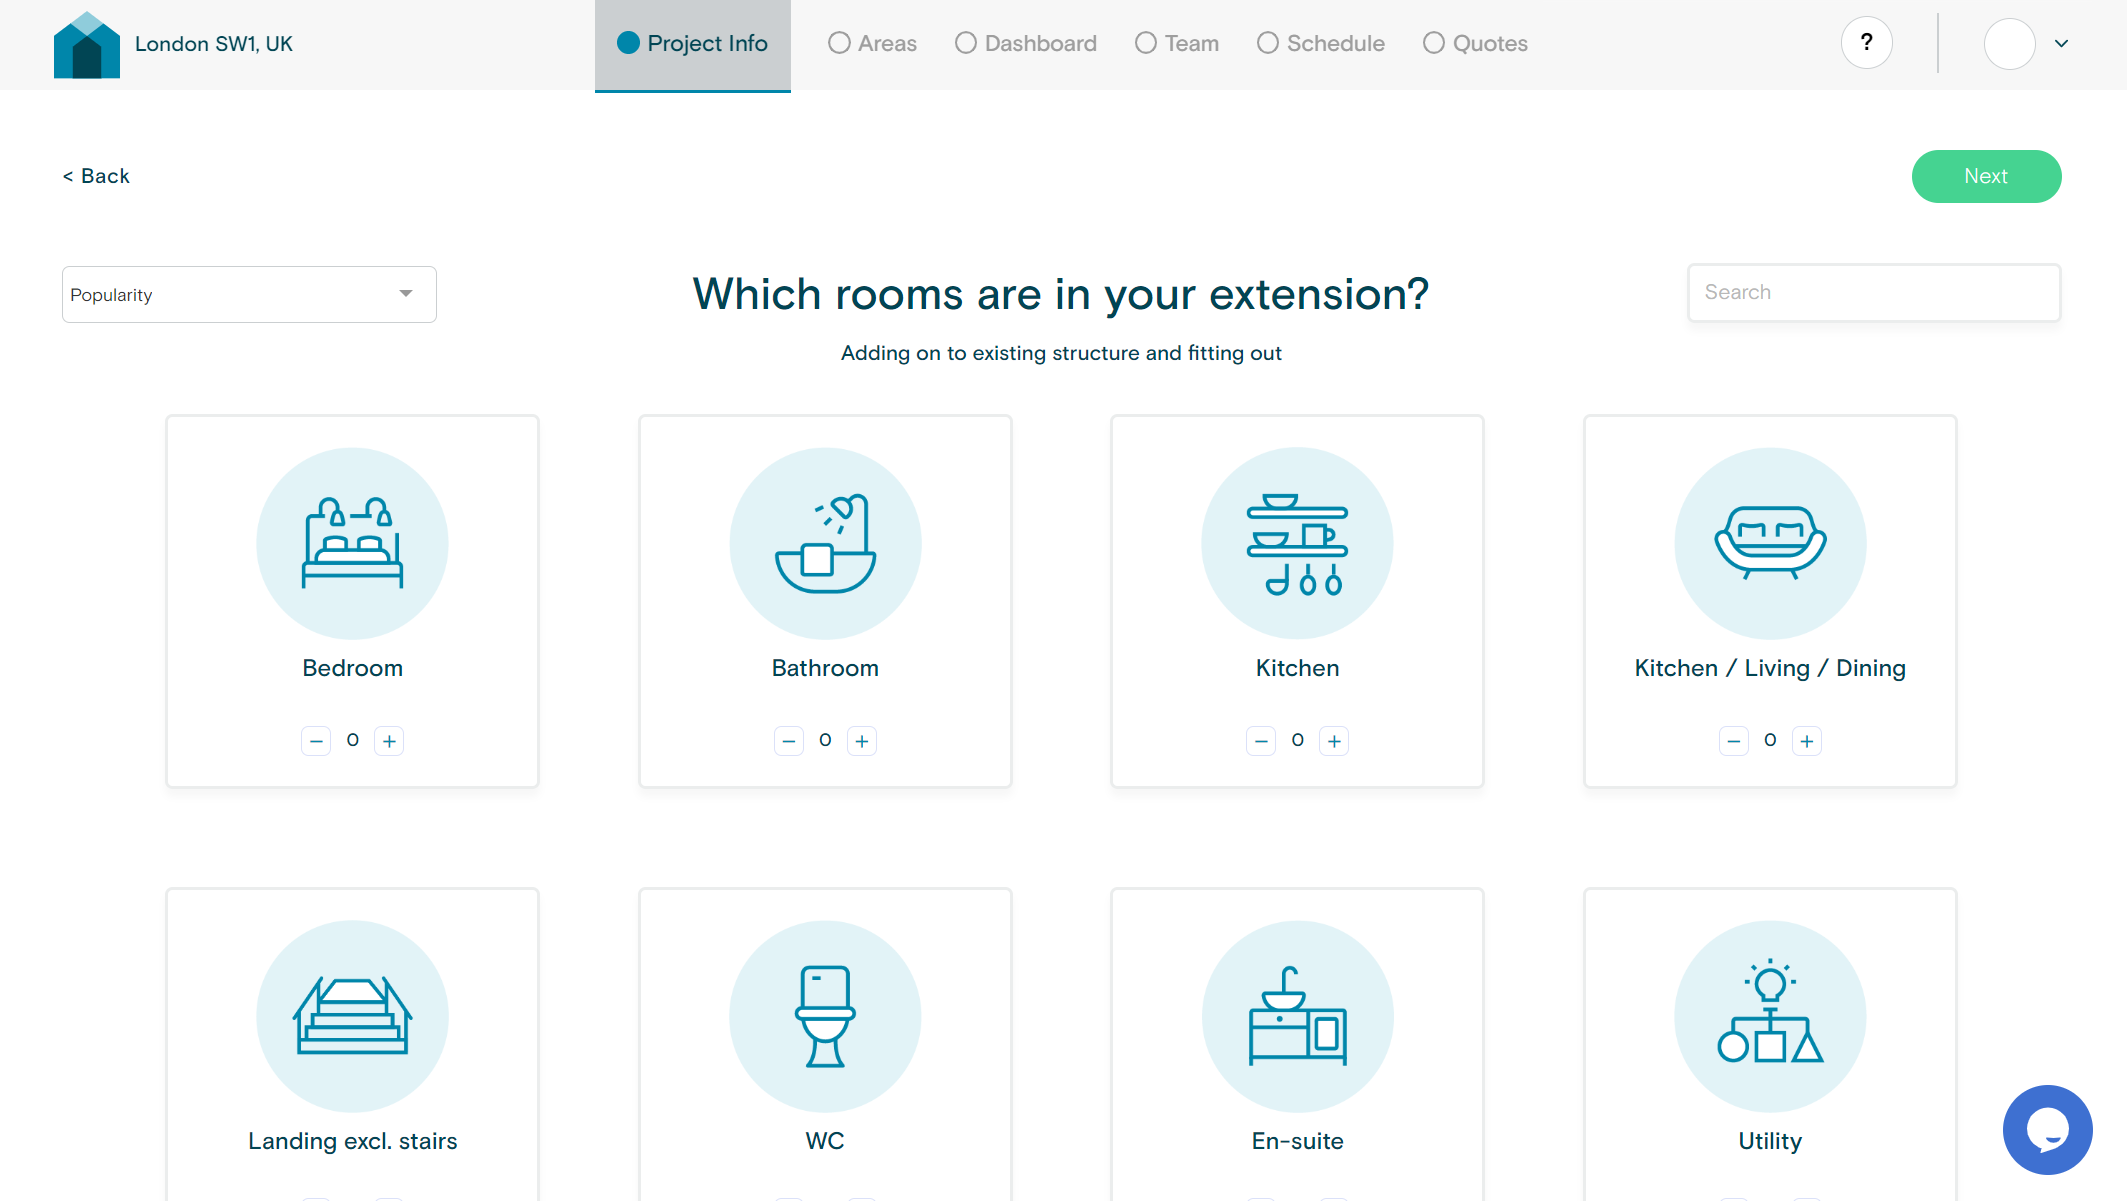
        5. Selecting Rooms

        On the next page, you can choose which rooms you’re refurbishing. There are over 45 options to choose from, including kitchen, bathroom, wet room, gym, pantry, and lounge.


        You can also use the search bar for easy navigation.


        Select all that apply and click “Next”. After clicking, our massive database will crawl millions of cost data points for labour and materials before compiling an accurate, itemised quote.

        6. Calculating Cost Per Sq Metre

        Once your construction project costs have been calculated, you’ll need to enter your floor plans on the “Areas” tab. Our system autosaves any changes, but you can also click “Save and Exit”.

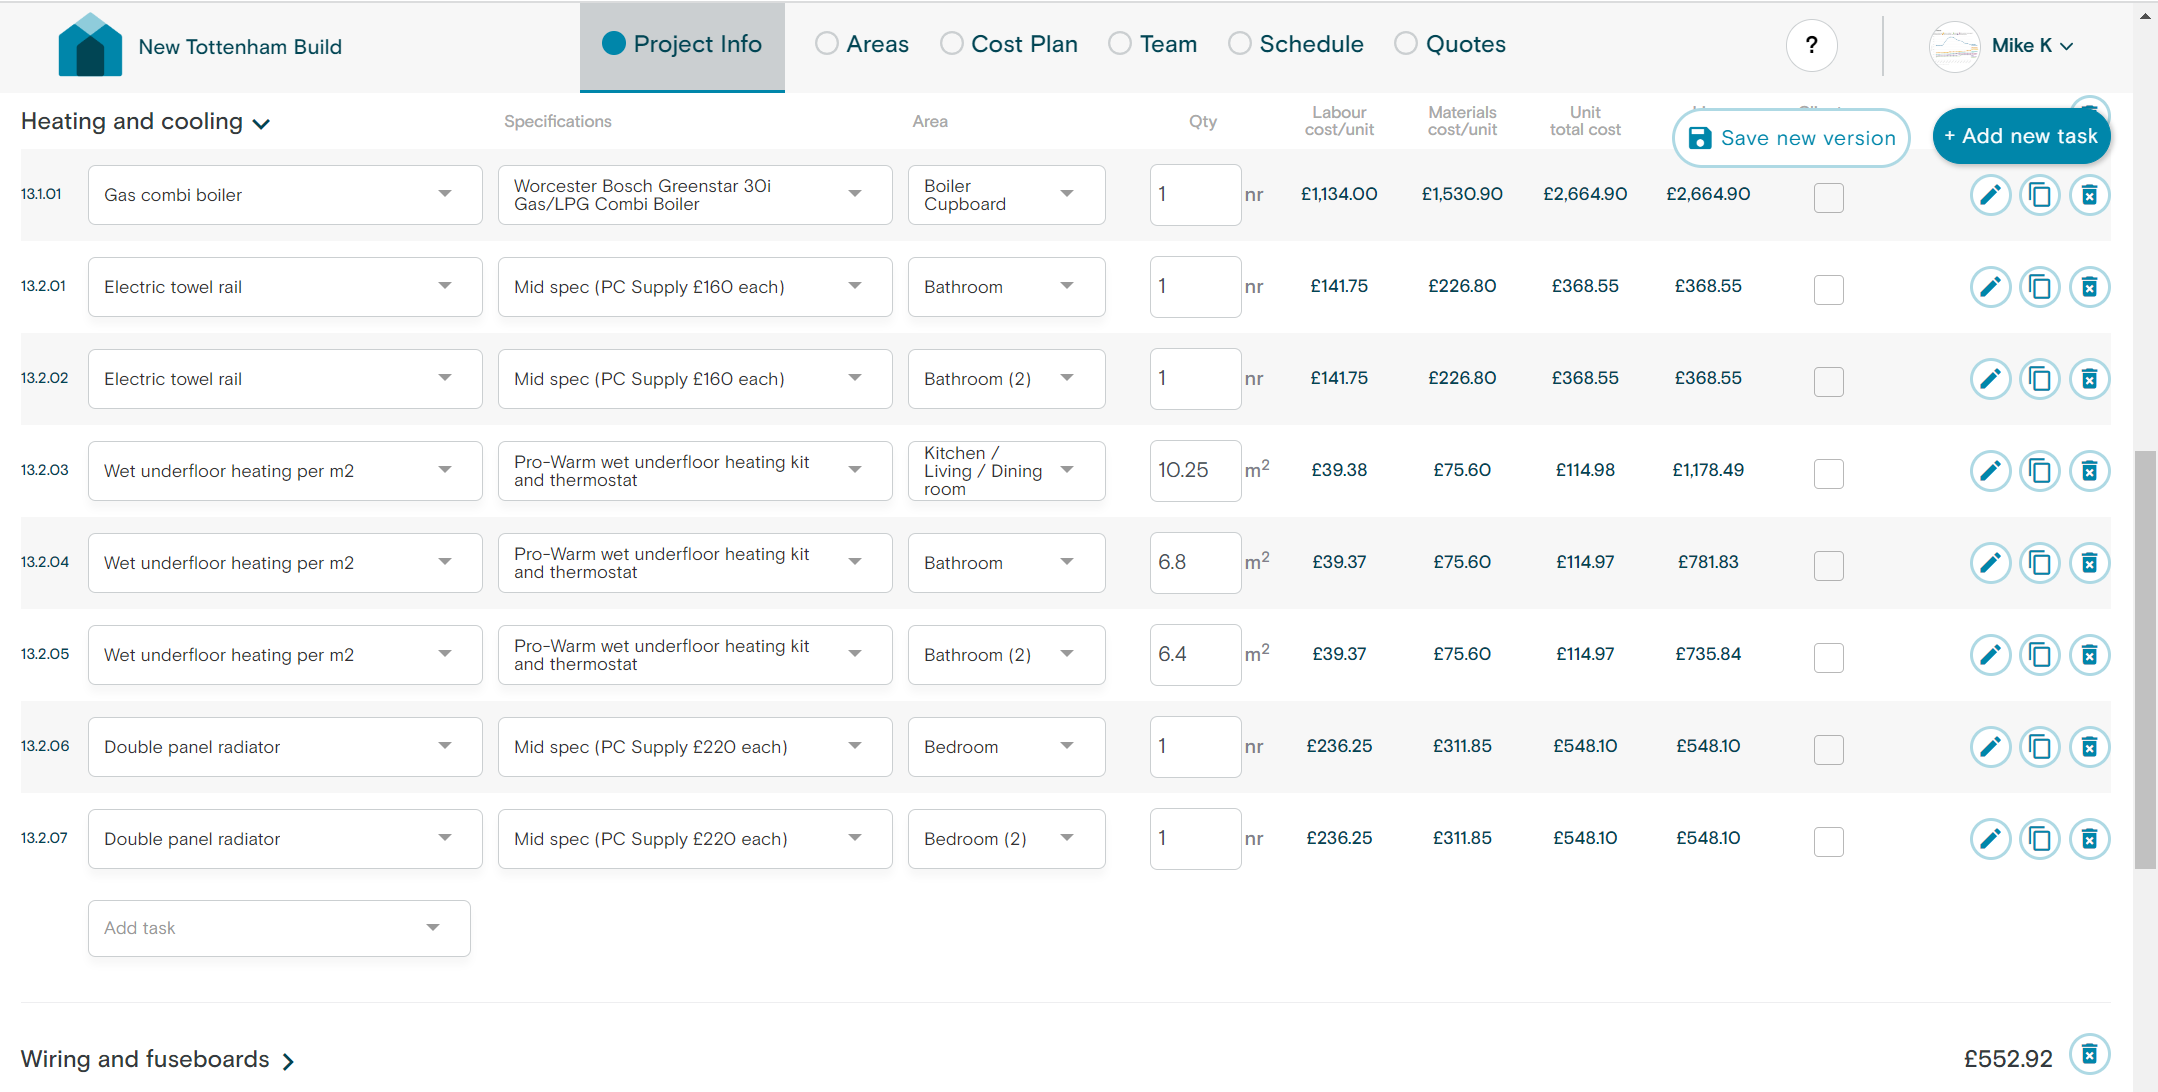
        Then head over to the “Schedule” tab to amend the itemised overview of anything and everything from Fixtures and Fittings, Drainage and Pipework, and Internal Doors and Frames. 

        You might, for example, decide that you need a 16-yard skip instead of the 6-yard skip that’s recommended.

        Once your quotation contains all the particulars required for your construction project, simply navigate to the “Cost Per Sq Metre” section to see your costs.

        Top Tip! In the “Quotes” tab, you can see three options for quotes based on different specifications: Low Benchmark, Mid Benchmark, and High Benchmark. 

        These serve as a useful price comparison that you can discuss with customers and amend accordingly by clicking the “Go to individual quoter” icon.

        Work Out The Cost Of Building A House – Demo

        Here’s a short video demonstration of how to use BuildPartner construction estimation software.

        No More Back-Of-The-Fag-Packet Calculations

        If you can operate an iPhone (or Android), you can master BuildPartner construction estimation software in no time. Get ahead of your competition while the technology is in its infancy. 

        Ditch the spreadsheets and try it out free today by clicking here. No credit card details required!

        Construction Costs – FAQs

        What are the average building costs per sq metre in 2023?

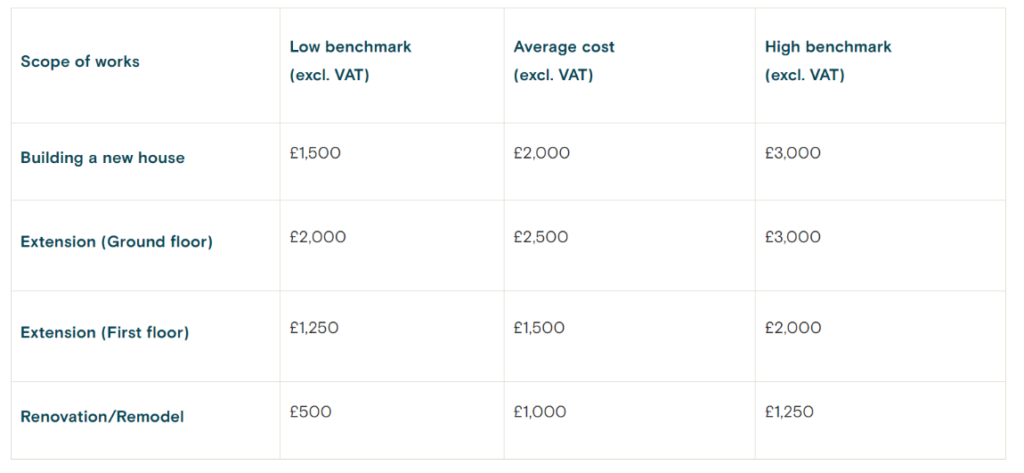
        We’ve covered this in greater detail in another article, but here is a summary of the average building cost per m2 in the UK (2023):

        What factors affect total house build cost?

        When starting, it’s a good idea to familiarise yourself with the entire scope of a construction project to avoid any hidden nasties. While there are too many to list here, we’ve selected the top five which have the biggest impact:

        1. Location. Factors such as local labour rates, availability of construction materials, transportation costs, and local building regulations vary from one place to another.
        2. Size and scope. The size and complexity of the building project directly affect the cost. Larger structures generally require more materials, labour, and time, which ultimately increases the overall cost.
        3. Design and architecture. The architectural design and engineering requirements influence the total cost. Bespoke designs require specialised construction techniques and materials.
        4. Materials. High-quality and specialised materials come at a higher cost. Additionally, the availability of certain materials in the local market also affects their prices.

        Labour costs. Labour rates vary based on the location, the skills required, market conditions (supply and demand), and even the time of the year (e.g., peak construction seasons result in higher labour costs).

        How can I save money when building a new home?

        When it comes to building work, saving money doesn’t mean you have to compromise on your fixtures and fittings or roll up your sleeves and don a hi-vis vest. You’ve got to work smart. Here are our top picks for saving money on a new-build home:

        1. Budget wisely. Whether you’re a commercial contractor or undertaking a self-build project, budgeting software will help you plan and organise your finances. Ditch the spreadsheets.
        2. Negotiate with suppliers. Go out of your comfort zone, and don’t be afraid to negotiate prices with suppliers. It’s common practice for some to artificially inflate their prices in anticipation of this. If you don’t ask, you don’t get.
        3. Obtain multiple bids. Even though it might seem like an unnecessary hassle, and even if you happen to like the first contractor, you should get multiple quotes from different contractors and suppliers. Compare bids carefully, considering both cost and quality.

        Get an accurate cost estimate instantly

        BuildPartner gives you detailed, location-specific construction costs in minutes.

          Categories
          Product Updates Blog

          Guide to Creating Accurate Construction Cost Plans

          Guide to Creating Accurate Construction Cost Plans
          Product Updates5 June 2023

          Guide to Creating Accurate Construction Cost Plans

          A detailed and accurate cost plan is a crucial element of effective construction management, facilitating budget control and project efficiency. As a continuation from our previous article about cost plans, we will delve deeper into how to construct comprehensive cost plans and illustrate how BuildPartner’s software can streamline this process for builders, architects, and project managers.


          How to Create an Accurate Cost Plan?


          Formulating an accurate cost plan is a detailed process involving meticulous understanding, calculation, and analysis. Here’s a more comprehensive look into the key steps:


          1. Understand the Project Scope and Specifications

          The starting point of an accurate cost plan involves a thorough comprehension of the project’s scope and specifications.

          Different Scopes include:

          • Basic – Including basic finishes e.g. Leyland, Everest, Wickes
          • Standard – Including standard finishes e.g. Dulux, Hamilton, Slim Line
          • High – High spec finishes e.g. Farrow & Ball, Fine Line, Seimens
          Choosing your specification in BuildPartner


          Different Specifications include:

          • New Build – Building a new structure and fitting out.
          • Extend – Adding on to existing structure and fitting out.
          • Remodel – Changing the layout of a structure or room and fitting out.
          • Refurbish – Replacing the finishes and fittings in their existing locations.
          Choosing your Scopes in BuildPartner


          Understanding the project’s intricacies, including the types of materials to be used, the complexity of the design, and the size of the project, enables you to provide precise cost estimates. This stage often involves engaging with the design team to get clarity on the specifics and working closely with stakeholders to understand their expectations.


          2. Gather Detailed Cost Information

          After developing a clear picture of the project’s scope, the next step involves gathering in-depth cost information for all project components. This entails estimating costs for materials, labor, equipment, and any other expenses, such as permits, licenses, or contingency funds. Make use of current market rates, supplier quotes, and historical cost data for similar projects to ensure the most accurate and up-to-date cost information.


          Detailed schedule of works


          3. Breakdown the Costs

          Following the collection of cost information, categorize the costs into different sections such as material costs, labor costs, equipment costs, and administrative costs. This detailed cost breakdown helps in better understanding where the majority of the project funds will be utilized and aids in identifying potential areas for cost savings.


          4. Include Contingencies

          In spite of the most thorough planning, unexpected expenses can occur during a construction project. To prepare for such situations, it’s essential to include contingencies in your cost plan. A good rule of thumb is to reserve around 10-15% of the total cost for contingencies, although this can vary based on the project’s complexity and risk level.


          5. Regularly Review and Update the Cost Plan

          As the project progresses, it’s important to continually review and update your cost plan. This involves tracking actual expenditures against your initial estimates, analyzing any discrepancies, and making necessary adjustments. Regular updates ensure your cost plan remains an accurate reflection of the project’s financial status and allows for more proactive budget management.


          6. Estimate Profits

          Part of your cost plan should also involve estimating the potential profits from the project. This is typically calculated by subtracting the estimated total costs from the total projected revenue. Estimating profits helps assess the project‘s financial viability and inform decision-making processes.


          7. Leverage BuildPartner’s Automated Cost Plans

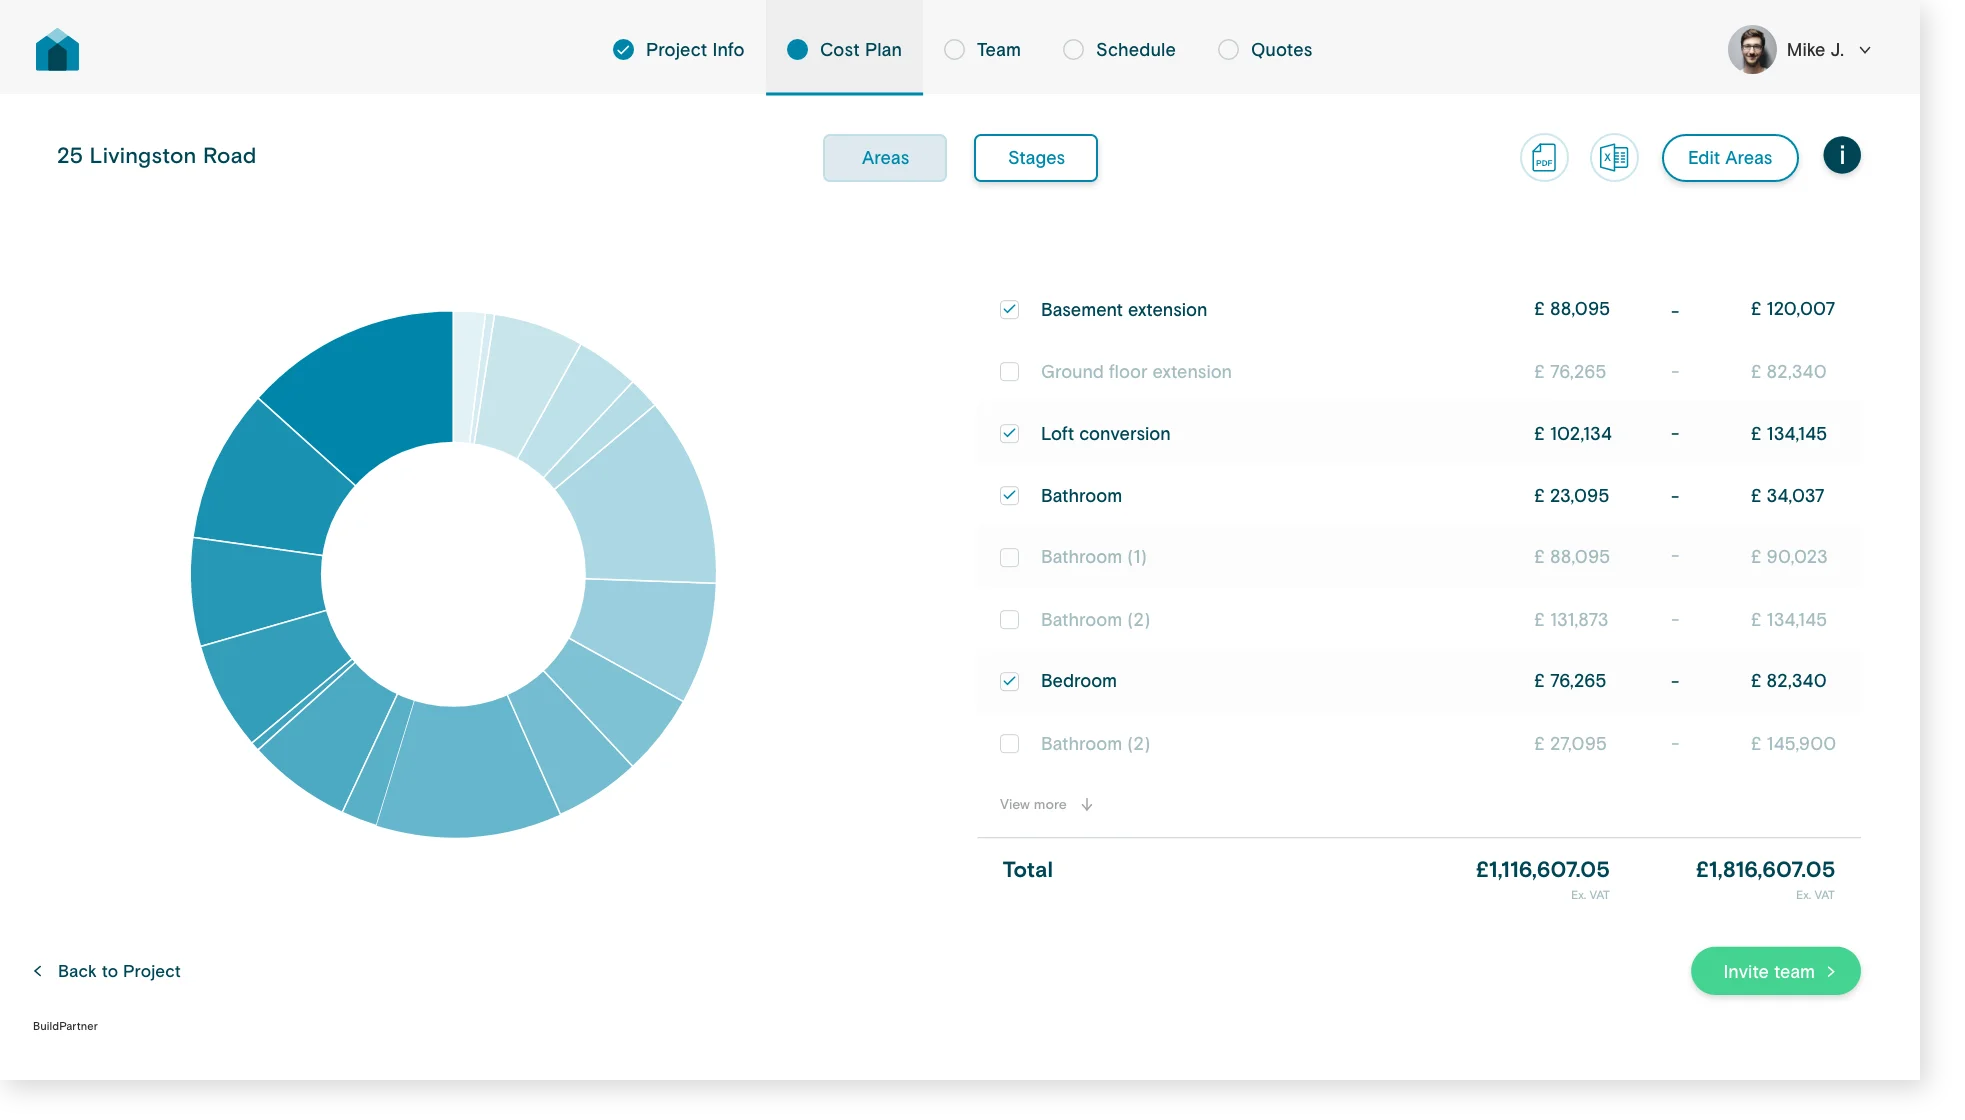
          To enhance the cost planning process, BuildPartner’s automated cost plan tool can be employed. This software automatically produces a detailed cost plan based on your project specifications and the most recent UK material costs, drastically reducing your workload and minimizing potential human error.


          BuildPartner Cost Plan
          BuildPartner's Cost Plan Breakdown


          In summary, developing an accurate cost plan is a multifaceted process that requires a deep understanding of the project, meticulous data collection, and regular updating. By utilizing BuildPartner’s software, this process can be greatly simplified, enhancing overall project management efficiency. To learn more about how BuildPartner can optimize your cost planning process, visit buildpartner.com.

          Get an accurate cost estimate instantly

          BuildPartner gives you detailed, location-specific construction costs in minutes.